The programming language we will be using to program the robot starting in the 2015 season will be Java. Java is a powerful, robust, and generally fast language used by much of the industry. For instance, Google uses Java as the backend for most of its most important services, as does Verizon, AT&T, and many other large companies. It is clearly a great language. However, to use it to its full ability, you must understand how Java works.
Let's start with the basics. To code in Java, you will need a program called an Integrated Development Environment, or IDE for short.
For years prior to 2015, the IDE used was Netbeans, which can be downloaded from NetBeans's Site. Here's the link for my instructions on setting up NetBeans: NetBeans Setup. For the old 2013/2014 API, use this link: 2014 FRC API.
Starting with the 2015 season, we will be using Eclipse. To set up Eclipse to work with our robot code, just follow these instructions: Installing Eclipse with FRC Plugins. For Ubuntu, you can install it alongside FRCSim by using the command found on the same site here: Installing FRCSim with a terminal. When coding for the robot, you will need documentation for the hundreds of classes contained in the FRC Java API. Here is a link to the javadoc with all the information that you will need once you are ready to code the robot: 2015 FRC API.
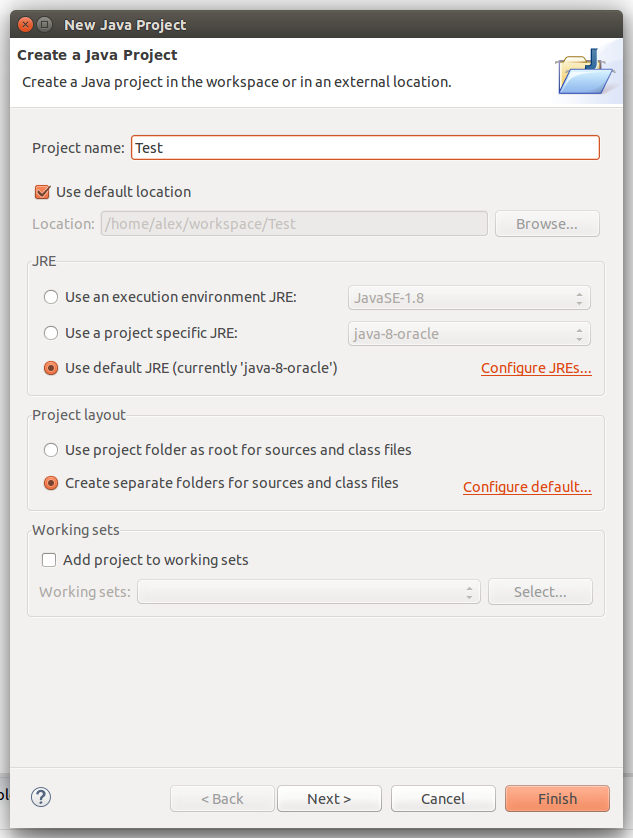
Once you have your IDE installed, you can start coding. To do this, go to File → New → Java Project , and give your project a name. We will be using "Test" for this part of the tutorial.
This should cause the project explorer pane to open. To start coding, make a new class by right clicking "src", which is under the Test project:
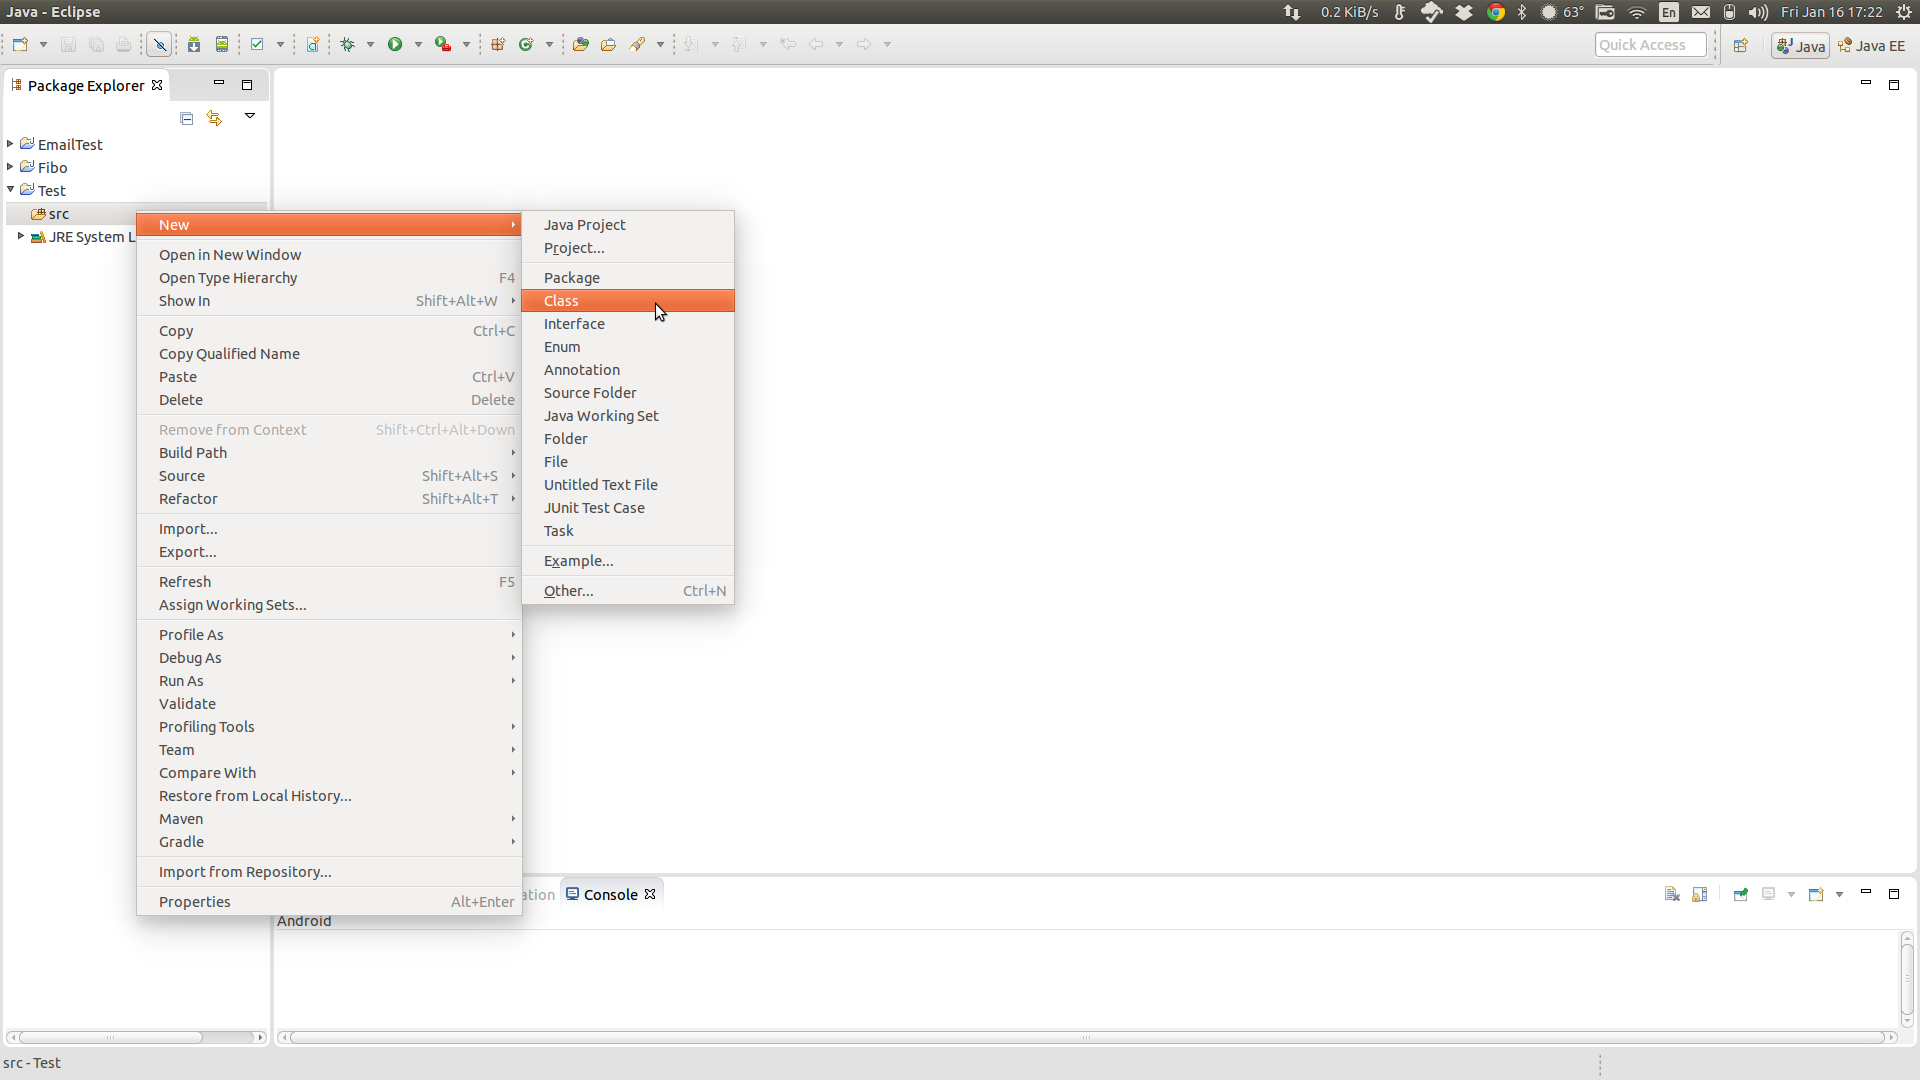

Make sure you choose the same settings as shown above for the first class you create. Now, let's talk about the code. The first line of code in the document is:
package test;
This is a more complicated topic of Java that only really starts to get explained in college level courses and isn't important to understand perfectly for our purposes. It basically helps organize different classes and for more complex projects can be used to manage program security.
The first important part of the code is:
public class Test{...}
This is where all the code (except for the "package" declaration and something else called imports) is put. We will talk more about what exactly a class is when we talk about object orientation later on in this tutorial.
The most important section of Java code is the "main method". This is the code that is run when a program is opened. In the FRC Java API, we do not actually see the main method, but it is running in the background of the robot project.
This brings up another topic. What is a method? A method is a chunk of code in a class. You can have methods to do basically anything such as output a line, calculate an area, or write data to a hard drive. The main method is just the first chunk that loads.
As you may have noticed, the main method has a lot of text in front of its name (main). It also has some text in parantheses after its name. I will explain the meaning of all of this later, but for now, just know that the main method is declared like this:
public static void main(String[] args) {...}
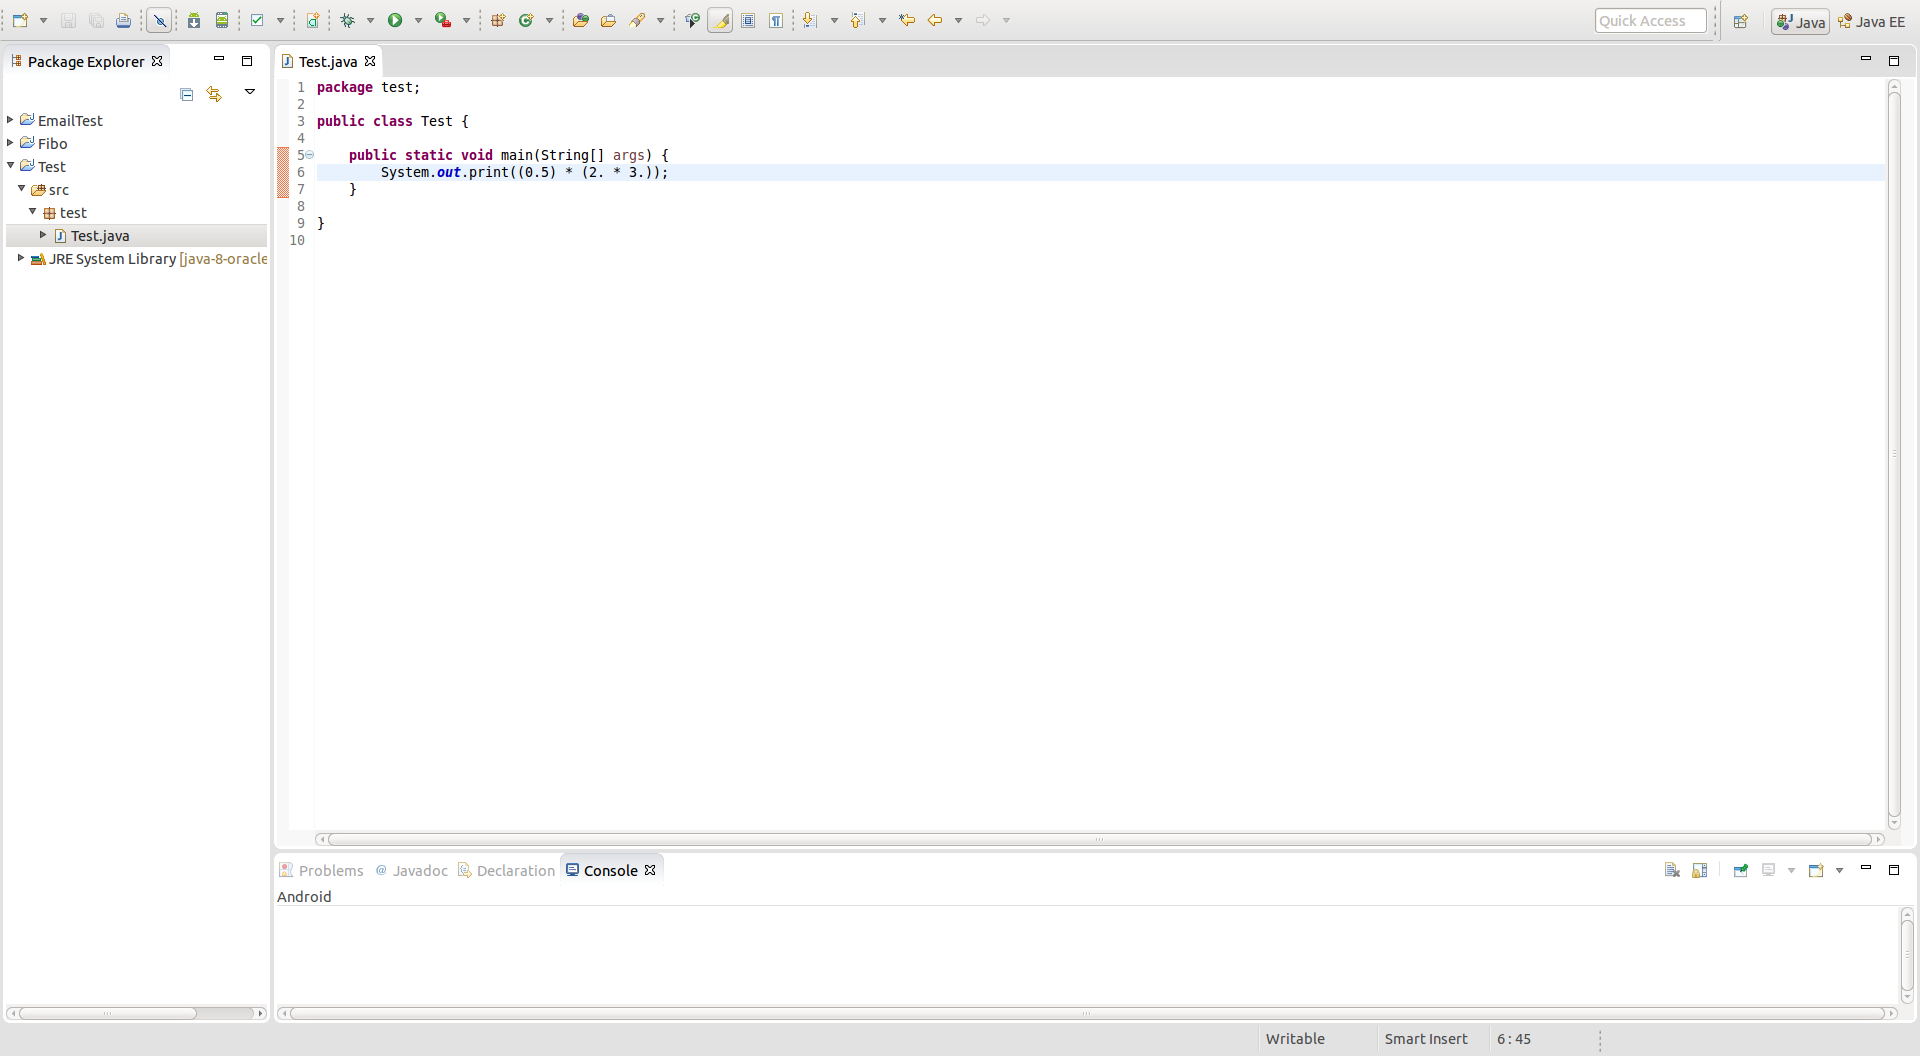
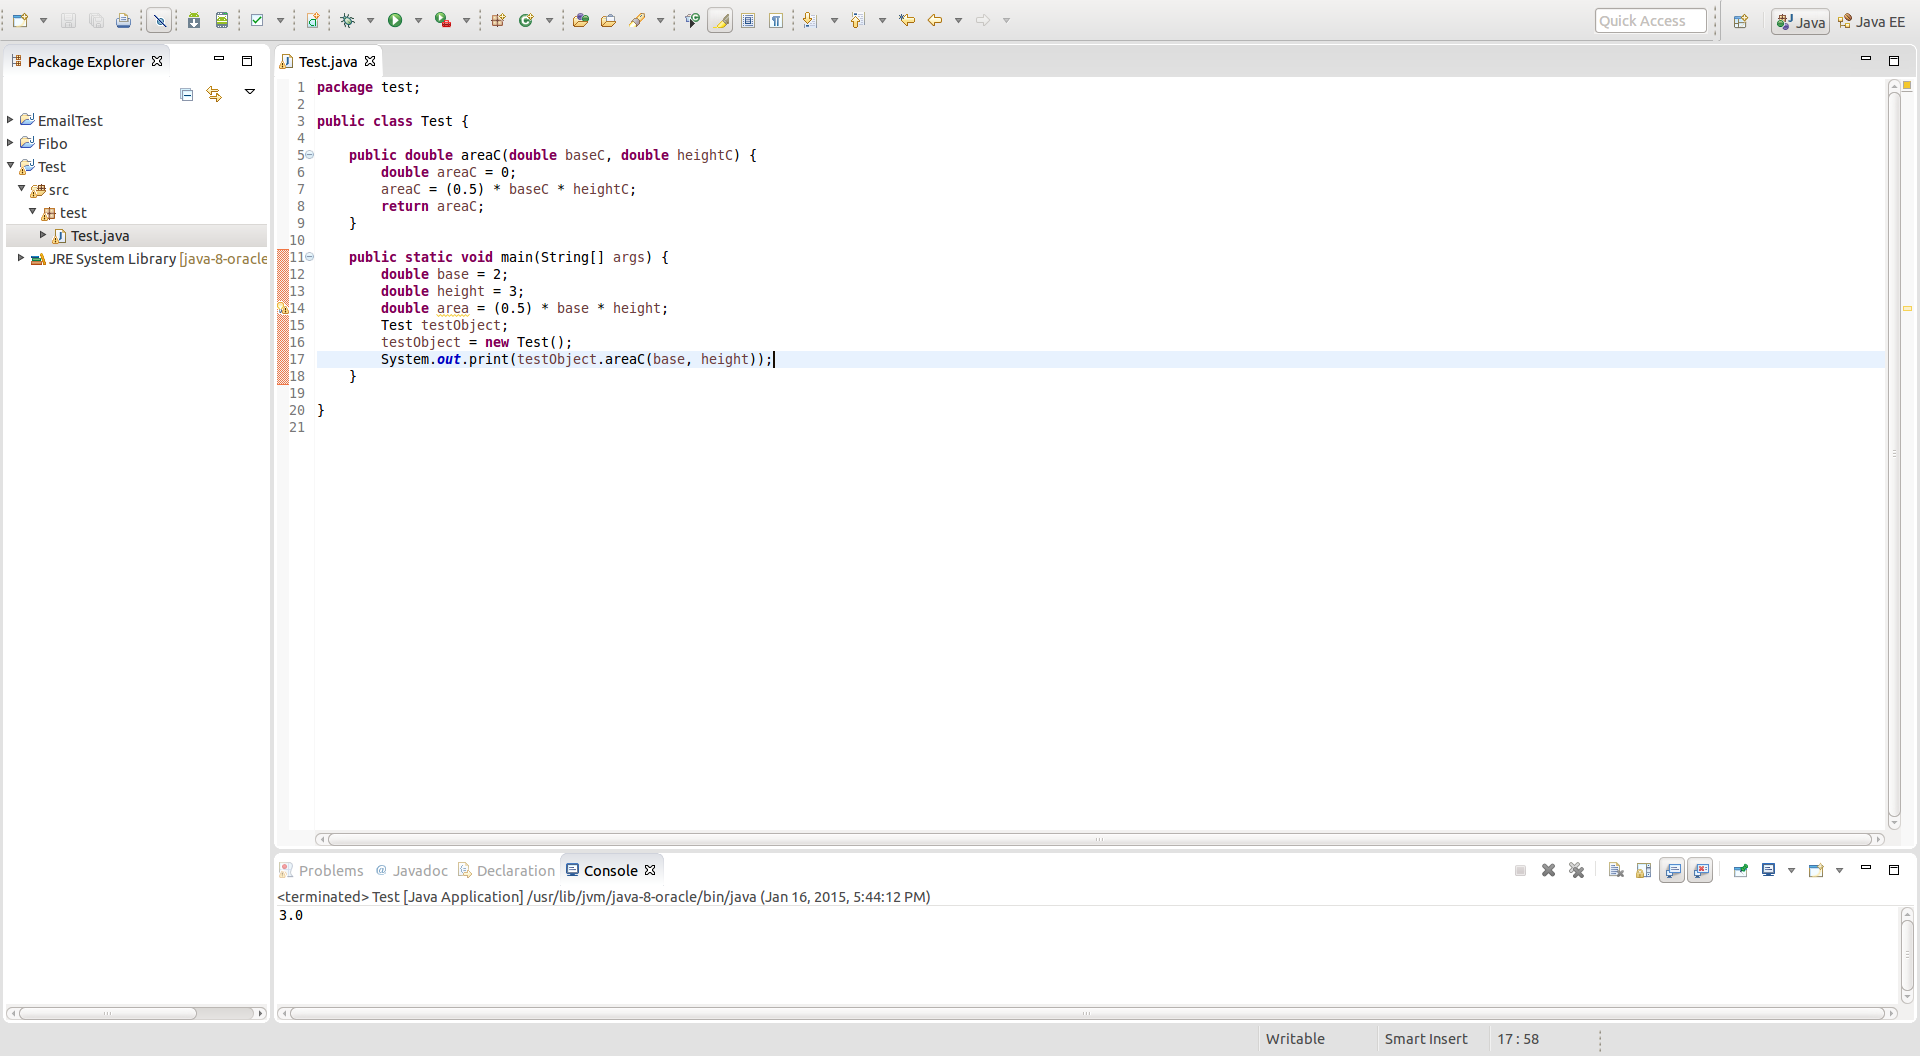
Now that you know the basic on how a normal Java project is set up, let's make it do something! First, let's make it calculate the area of a triangle. First, we need to understand how math works in Java. In Java, we can work with 4 types of operators: + (addition), - (subtraction), * (multiplication), and / (division). These are pretty self explanatory. Then, there are 2 types of numbers we will be using: integers and doubles. An integer is a number without a decimal and a double is a number with a decimal. In the case of math, doubles should be used. Now, let's get on to creating the code to calculate the area of a triangle. Lets assume that we have a triangle with a base of two and a height of three and we want to print that to the console (the output near the bottom of the IDE). The code for this would be
System.out.print((0.5) * (2. * 3.));
As you can see, the way we print something to the console (which we usually use for debugging the robot) is with System.out.print(...). Also, notice the semicolon at the end of the line of code. This tells the computer where a line of code ends and you need one at the end of each line of code. Also, notice that 2 and 3 have a dot after the number. This is done to tell the computer to evaluate the numbers as double (numbers with decimals) instead of integers. If you try to simply do (2/3), the computer will just truncate (cut of the end of) the output, so instead of getting 0.6666666666, you get 0. Just as a side note, you may have realized the line of text that has "//" in front of it. That is a comment and all it does is give the person who is coding more info on what is going on. For the sake of cleanliness, I have removed the comments from the code in my screenshots for this tutorial. DO NOT REMOVE COMMENTS FROM THE ROBOT CODE however. Most of the comments give you hints on how to write the robot code. This is what your screen should look like:
What if you want to store values? All this code currently does is print some info. To store info, you must declare variables like this:
double base;
double height;
As you can see, declaring a variable is quite simple. It's the type of variable, followed by the variable's name. Once that is done, you need to give it some variables. This is usually done in the constructor (which we will talk about soon), but we can also give them values in the code by putting these line in a method (such as the main) like this:
base = 2;
height = 3;
If you are in a method, you can combine the declaration and instantiation statement into one line like this:
double base = 2;
double height = 3;
Since they are already declared as doubles, you don't need to add a dot to the number. Now you have variable that you can use in your code! To use them, just replace the numbers from the code with the variable.
The print statement above now becomes:
System.out.print((0.5) * base * height));
Also, if you wish, you can divide by two instead of multiplying by (0.5). We don't have to put a period after the 2 now since we are doing the division on a double.
System.out.print((base * height) / 2);
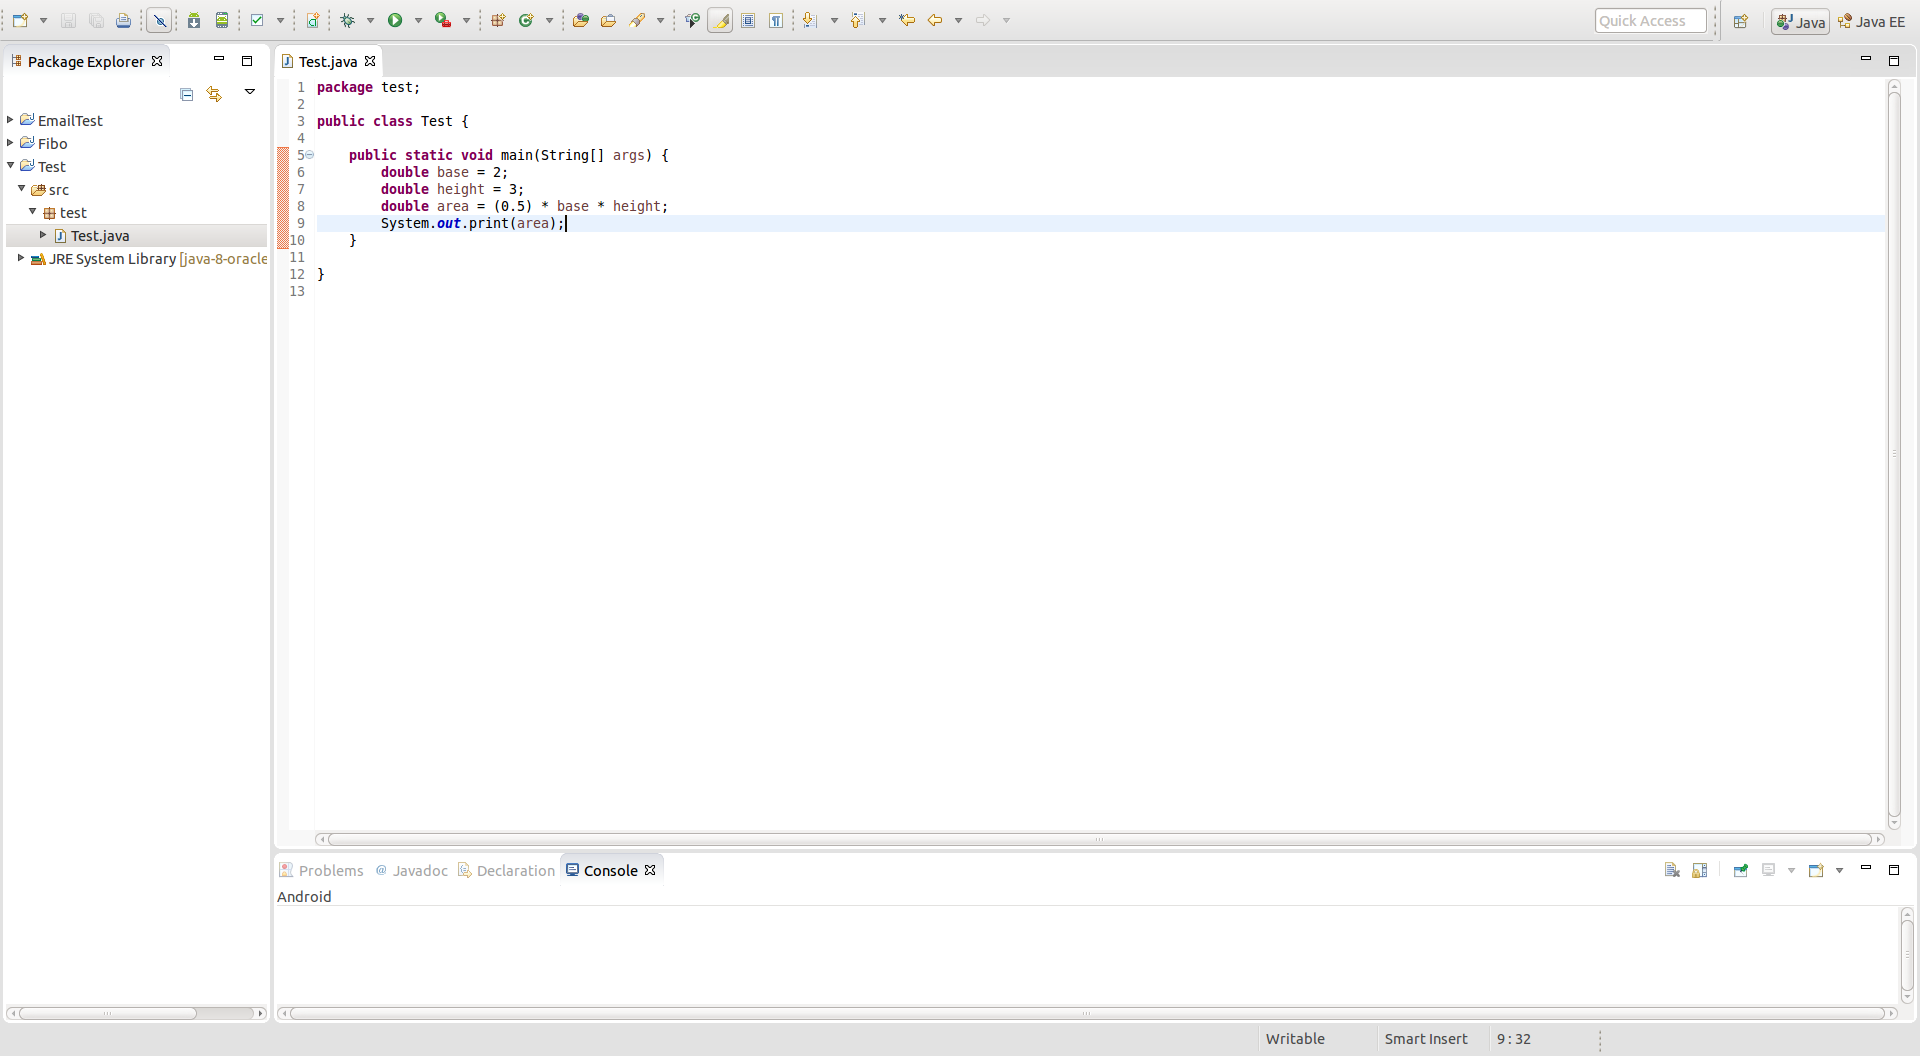
As I mentioned earlier, you can save calculated values in variables as well. To do so, you declare and give a starting value to a variable,just like the other variables, and then you basically write and algebra equation like this:
area = base * height / 2;
Now to print the result, replace the equation in the print statement to area like this:
System.out.print(area);
This is what your code should look like:
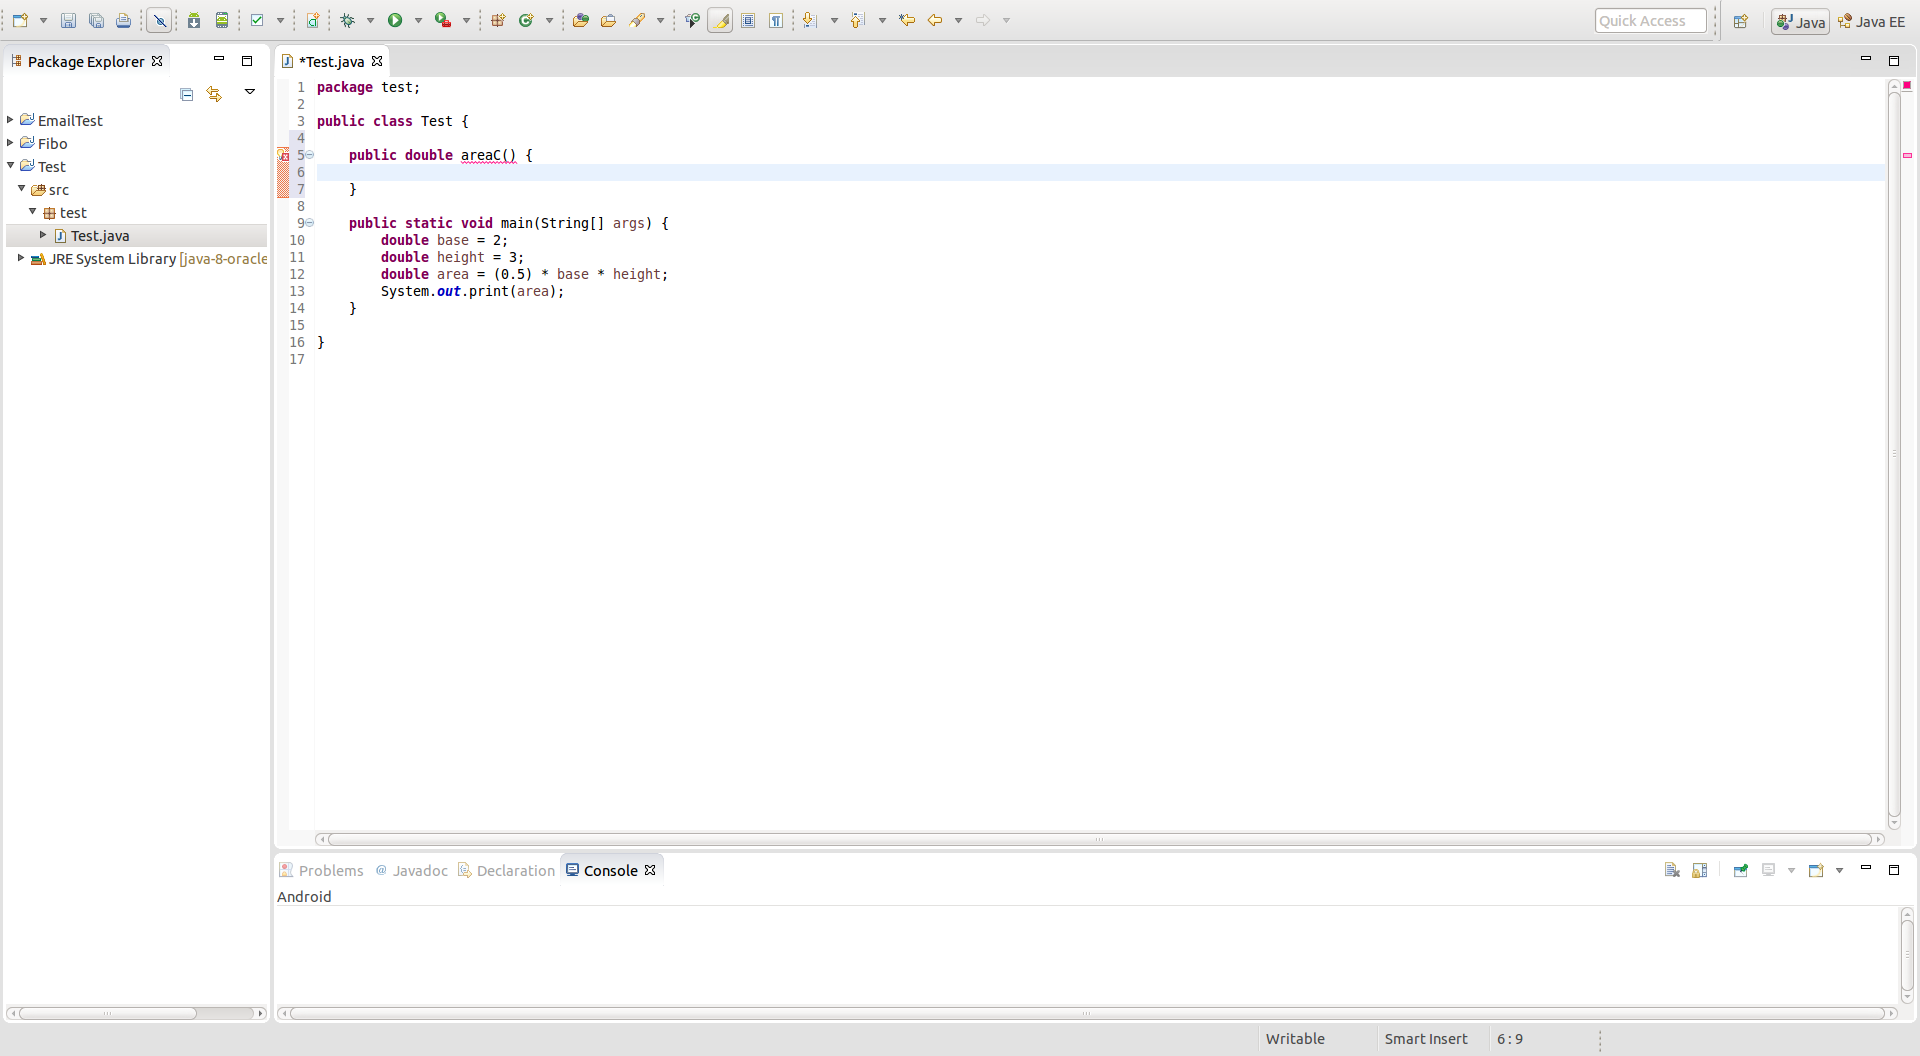
Simple so far, right? Now, we will start getting into more complicated stuff. As the robot code is highly object oriented, you must understand what objects are and how to use them. First, we will talk about methods. As I explained earlier when talking about the main method, a method is block of code that can be run. Methods can return anything, including primitives (such as doubles, ints, chars, etc), Strings, Objects, or nothing. The code to create a basic method that returns a double is this:
public double areaC(variables) {...}
The "public" in the method tells the code that this method can be accessed by any other part of the program, the "double" is the value the method returns when run, and "area" is the name of the method. The values in the parentheses are the variables you want the method to use (such as base and height) and the code you want to run goes between the curly brackets. Your code should look like this:
As you can see, Eclipse is giving us an error. If you check what the error is, it says that it does not have a return value, but it is supposed to return a double. To do this, declare the variable, instantiate it (give it a value), and then type:
return areaC;
It should look like this:

Now here comes another question: how do we send this method variables to do its calculations? Well, we put it in those parantheses (separating them by commas) of the method declaration like this:
public double areaC(double baseC, double heightC) {...}
Note that you should not have the same name for variables in different parts of your code. It can cause confusion and make debugging more difficult. Now you can write you code to do the calculations before the return statement, just as we did before. Your finished method should look like this:

Now, how do we use it? Well, we have to create an object. An object is an instance of a class. You can have multiple objects of a single class in your code, so you can, for instance, have multiple triangles with their own bases, heights, and areas. It's basically like a variable with code that can be run. Declaring an object is exactly like declaring any other variable. We want to make an object using the Test class, so we declare it like this:
Test testObject;
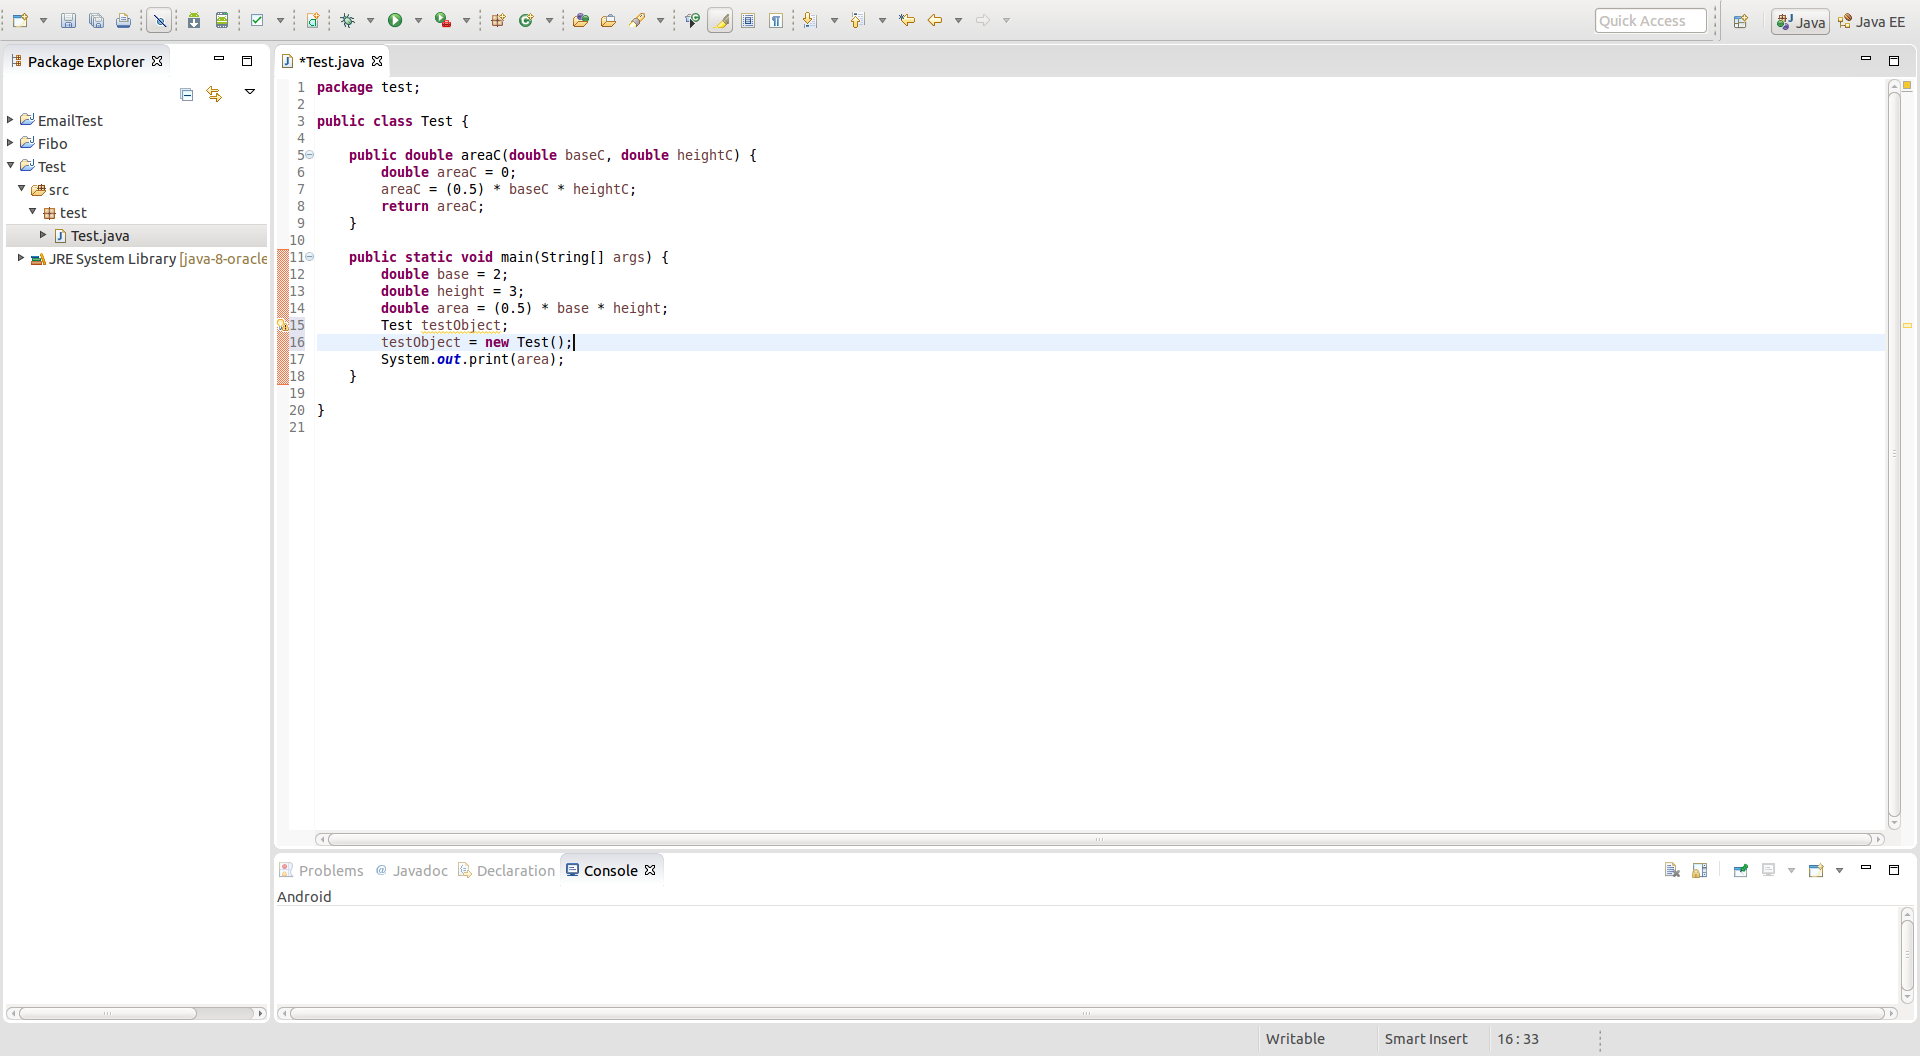
Instantiating the object is a little different. To instantiate this object, you run:
testObject = new Test();
Your code should now look like this:
Now, you can use that method you created earlier. To do this, you tyoe the name of the object and the name of the method separated by a period. You put the variables in parantheses after the method just like in the method's declaration. This is what it looks like:
testObject.areaC(2, 3);
When a method with a return type other than void is called, it acts like the variable that it returns. Thus, the above code acts like a double variable. To use it to output an area, just replace area from our previous code with the method like this:
System.out.println(testObject.areaC(2, 3));
You can use variables in the method call as well like this:
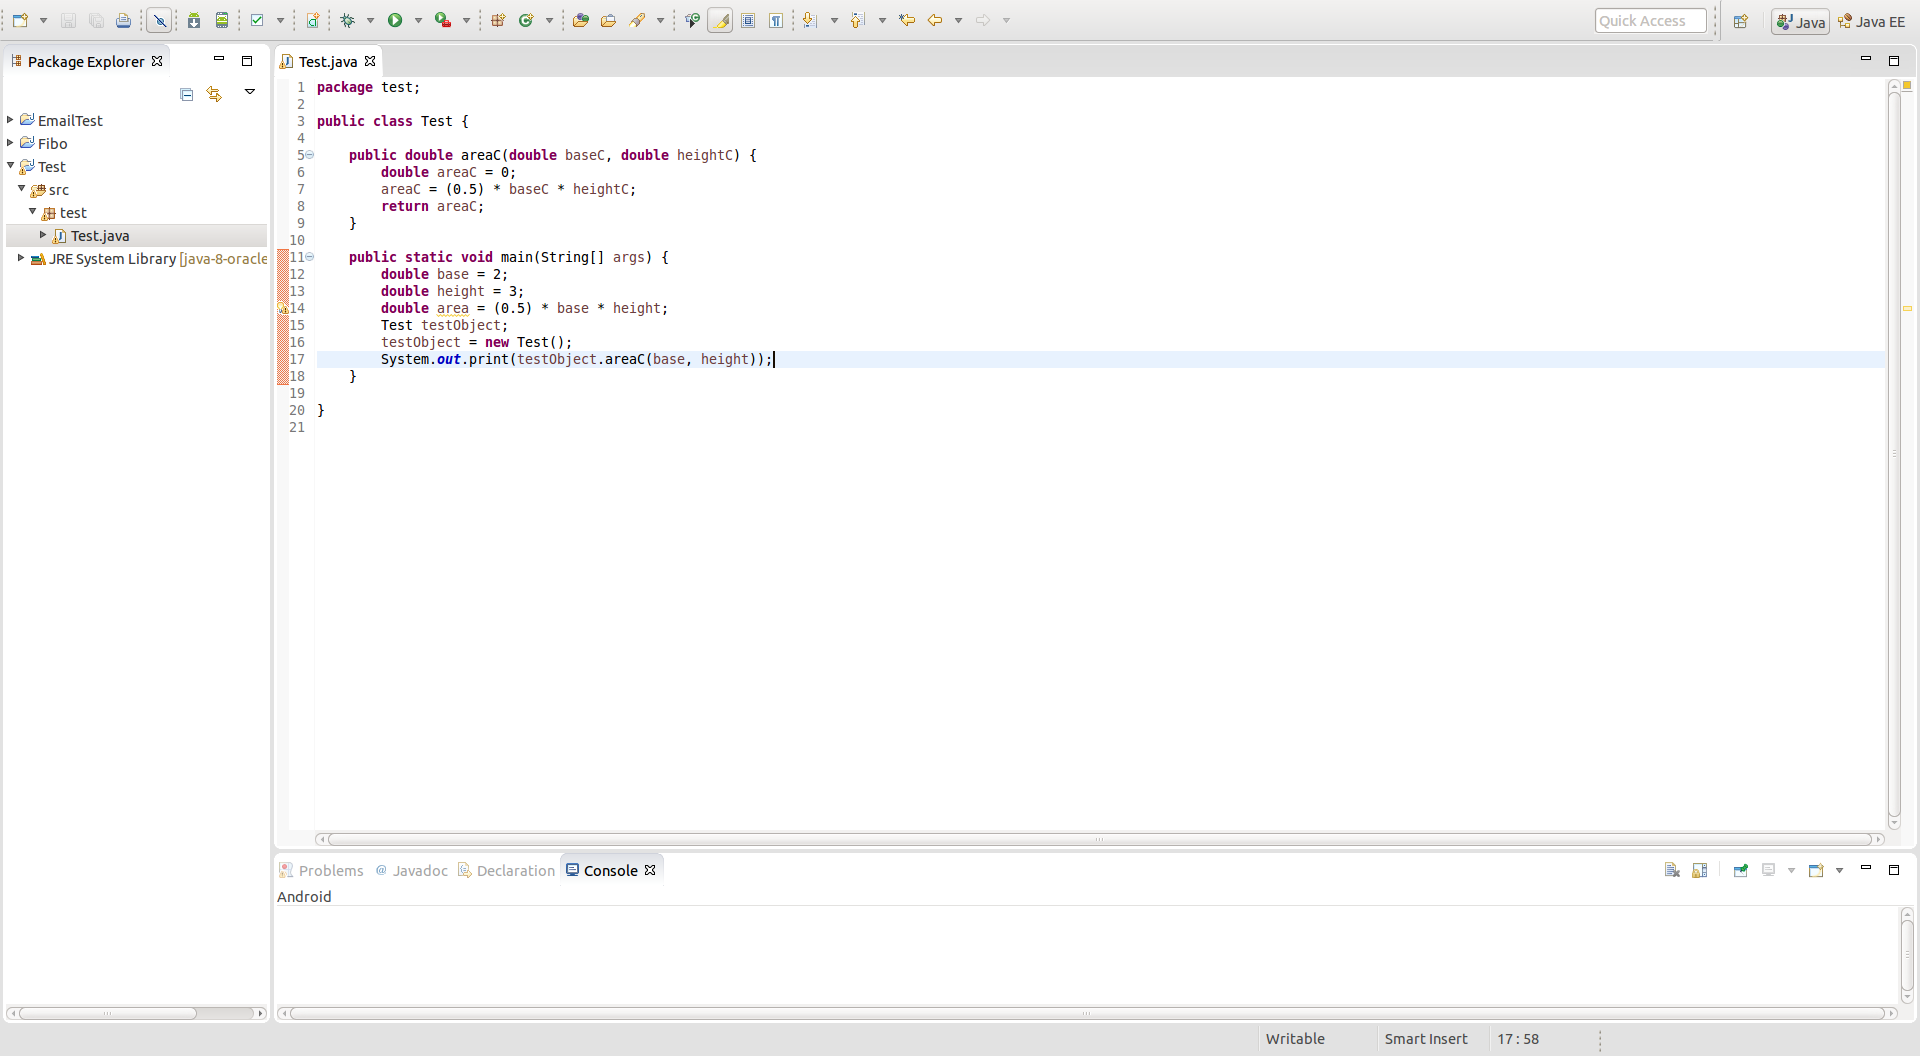
System.out.println(testObject.areaC(base, height));
Your code should now look like this:
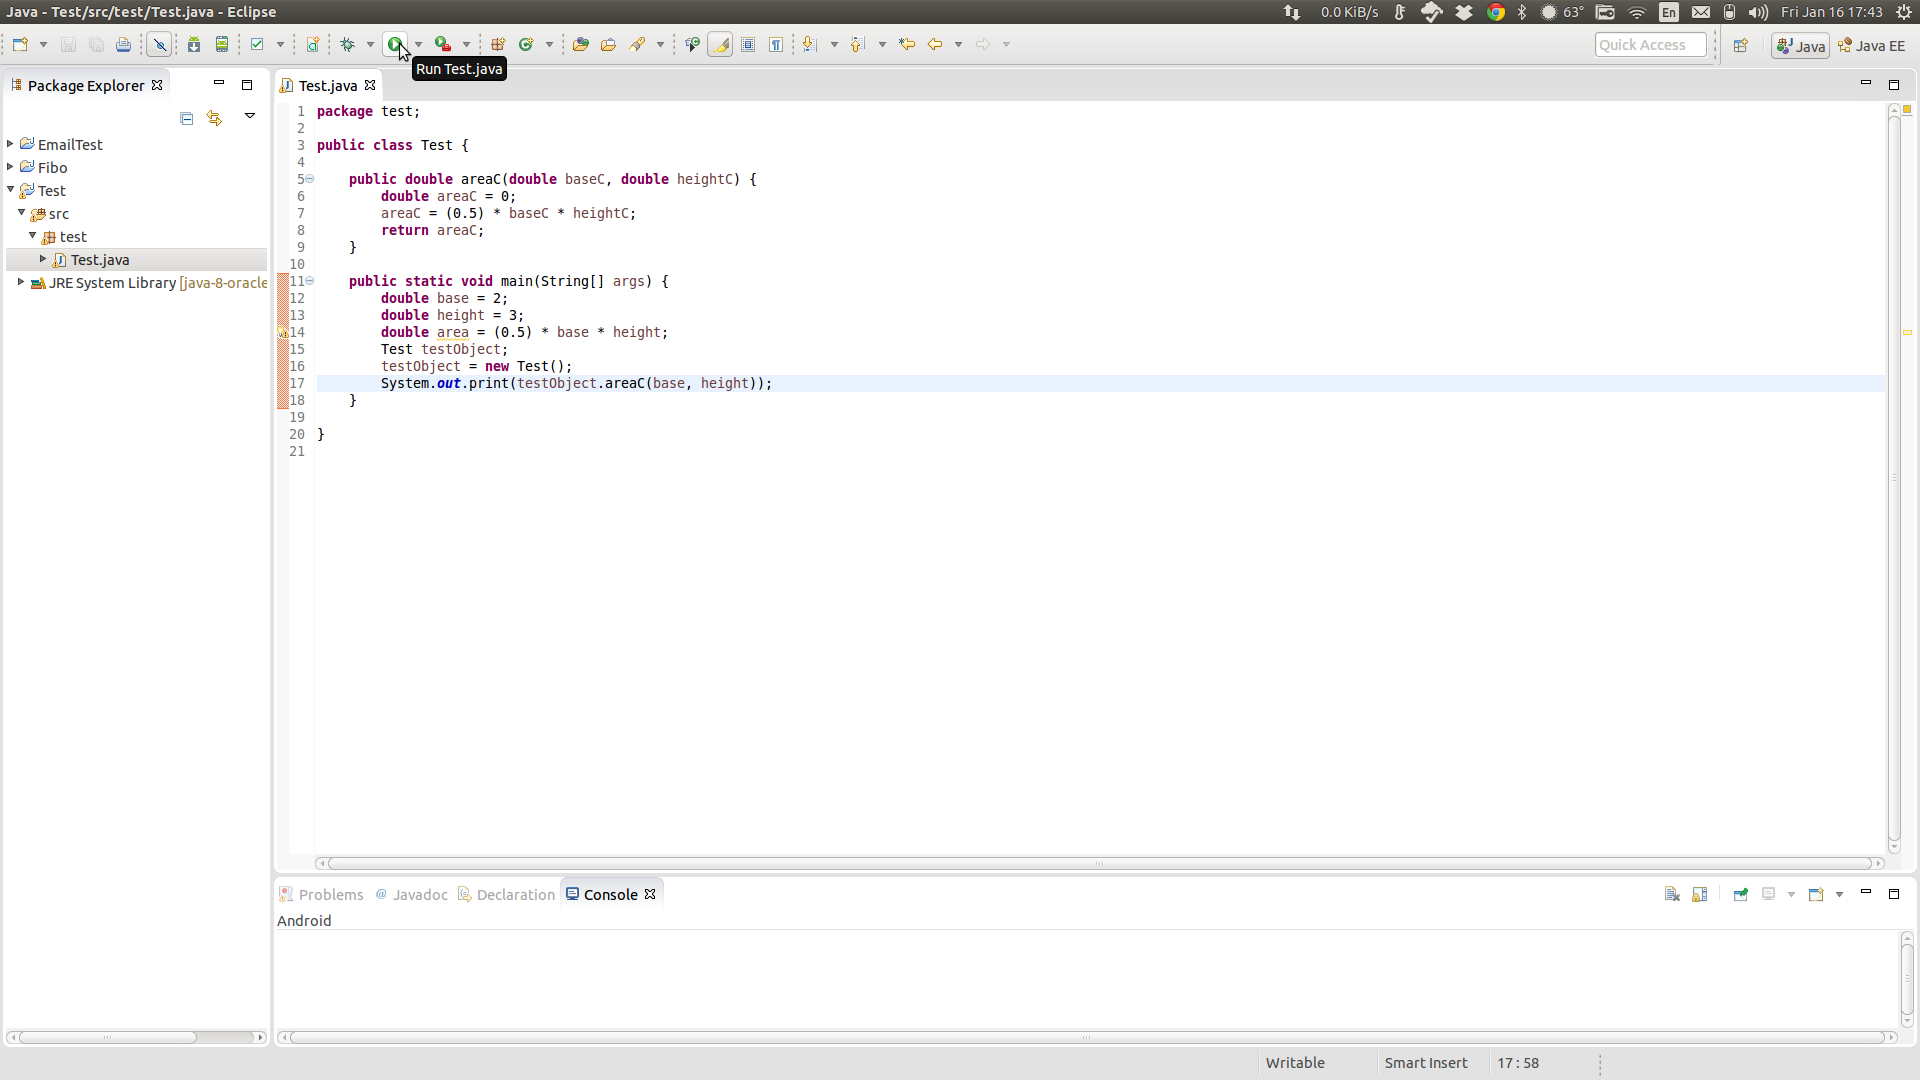
If you want to run the code we've just created, first click on the "Run" icon. This will automatically clean, build, and run the project.
The output should look like this:
Note that print simply outputs a String and that's it. For code where we may use multiple lines of output, you can use System.out.println, which adds a line after its text, instead of System.out.print, which just outputs what it is given without any spaces.
There are two more things you need to learn about for the robot code: if statements and while loops. Let's start with if statements. An if statement is a block of code that runs only if a certain condition (such as 3 < 5) is true. For instance, in the 2014 robot we had 2 kick modes that would shoot the ball at different speeds. One ran when a certain joystick button was held and the other when it was not. After the code runs or if the condition is false, it just continues though the rest of the code. This brings us to if else and else statements. There may still be a code that you want to run if the code in the "if" statement is not run. In the 2014 robot we needed a way to run the kicker in two different modes without the other one getting trigerred after (for instance, now the driver is pressing the button after the first if statement finishes, causing both if statements to run). To do this, we had one kick mode in an if statement, and the other in an "if else". If an "if" statement's condition is false, it then checks the "if else". If the original if statement's condition was true, it just skips the "if else" when it continues through the code. An else statement is similar to the if else, but it doesn't have a condition. If all the "if" and "if else" statements' conditions before the "else" check as false, the else code runs. Here's what it looks like in code:
if (*condition*)
{*code for if statement*}


if else (*condition*)
{*code for if else statement*}


else
{*code for else statement*}
Note: you can use as many "if else" statements as you wish.
Now let's talk about while loops. While loops are sort of like if loops that run multiple times until the condition is false. On the 2014 robot, this was used for reloading the kicker as we had to run the motors to pull the kicker back until a limit switch switched to on, indicating that the kicker was in position. This code would be written as such:
while (*check if limit switch is not activated*)
{*code telling kicker motor to pull back kicker*}
*code telling kicker motor to stop*
This is basically all you need to know about basic java before you can learn about the basic robot code. If anything else that we need comes up during the season, you will be taught then. If you are unsure of something, go back and read over this section again. If re-reading does not help, ask the manager or mentor through email or at the warehouse.
Preface: To understand why the robot code is structured as it is, you need to understand real-time processing. The Operating System on the roboRIO and the API (specific libraries for use by us) that goes along with it are designed to be real time. If the real-time tasks (an example would be PID error correction) are not run on time, they would not run correctly. In other words, time critical tasks must not be interrupted and the code had been structured for this. This should help you understand the way the code is designed for the robot.
Now let's talk about the stucture of the code, starting with what happens when the code starts. First, the robot runs a main class, similar to a normal java program. The very first method of the class that is run is called robotInit. This code basically sets up the entire robot and gets it ready to go. It sets the autonomous mode, or in our case gives our drivers a choice between multiple autonomous modes, it sets preferences, and it readies the subsystems and their default commands for use. The rest of the main class for the robot is managed by background tasks, so we don't have to worry about that.
I mentioned earlier "subsystems and their default commands". You may be wondering what I mean by a command, and that leads us to the next section of this tutorial: commands and subsystems.
Remember how I talked about real time processing in the preface to this section? Well, this is where it is used. As we will be doing calculations in our code, we need to make sure we don't make the code crash due to an infinite loop or something similar. If the robot was moving forward during that time, it would continue moving forward if the program crashes, which can be very dangerous. Thus, we have a specific type of class that does calculations and another that simply interacts with the hardware. Commands are the classes that do calculations, and subsystems are the classes that interact with the hardware. This way, if you have a calculation that's taking a long time and not responding, you still have your subsystem active to manage the robot's movements. This also ensures that real time tasks such as PID run correctly as they are independent of other parts of the program.
There are 2 final classes you need to know about when you make your code: OI and RobotMap. OI, which is short for Operator Interface, is the class that manages input from joysticks and the buttons. It tells the robot what command to run when a button is pressed and allows the robot to use joystick values globally (any part of the program can use joystick values if it needs to). The RobotMap is simply a data store for wiring. When we are making our robot code initially, the robot will not be finished and thus will not be wired. Thus, we can just store values in RobotMap and when electrical is done we can just take all the values for motor ports and such and add them all in one central location intead of searching for them in different files of the project. It also allows us to set universal values for things like height limits for the elevator.
Now let's recap the way the robot code works.
Now, lets talk about the methods that are created by default in commands and subsystems.
Command methods:
interrupted method, which is explained lower in this list. To set a required subsystem, you simply type requires(Robot.subsystemInstantiatedInRobotClass); I will give an example in the next section of this tutorial, "How to use the FRC API".That's it for the command. We will talk more about how to use it in the next section.
Now let's talk about subsystems. They are quite simple and have one default method:
Other than that, you create your own methods for the commands to set motor values and such to the hardware through the subsystem. We will go more in depth in the next section.
This was a very difficult section, and it is suggested that you read over this a few times until you understand the basics on the set up of the code. The next section will show you how to actually use this information to make a basic robot code. And remember, you don't need to understand this section perfectly. If you understand just the general structure of the robot code and how commands and subsystems work, you should be ready to move on.
Git: When the season starts, the programming manager will create a project based on the robot template that was designed to be used in the way described in the previous section. He will then upload it to something called git. Git is a Version Control System, or VCS. It allows us to work on the same code more easily and also keep track of changes, so we can see where bugs were created. The main reason, however, is just that it makes it easier for all of us to be working at the same time. Once the server has been set up and the initial project is ready to be working on, make sure that when you commit (upload your modified code), ALWAYS PUT A MESSAGE INDICATING WHAT YOU CHANGED. It makes it easier to track. If you added a new file, you can state that this is the initial commit for said file. If you modified a file, say what exactly you changed.
Now that we know how the robot code is structured, let's put it to good use. Here is the order you will be working in:
In short:
Remember, if you have any questions, ask the programming manager for help. Also, you may have to declare multiple subsystems to do certain tasks. Now, let's make some code.
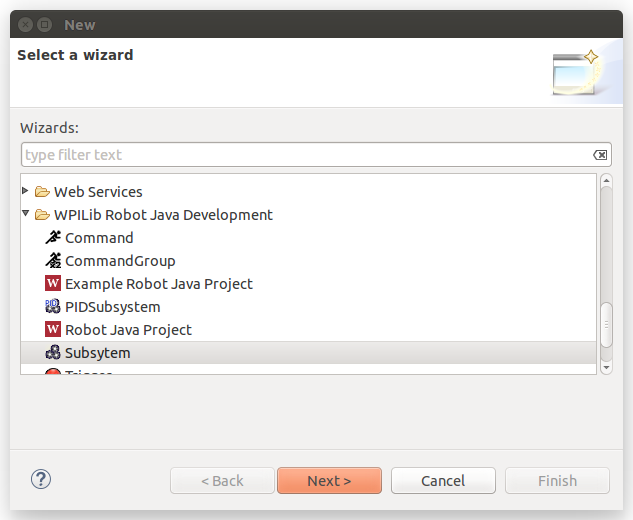
Starting with the first task, lets say our job is to add a drivetrain (a.k.a. chassis) that will simply drive forward. We will call the subsystem chassis. Obviously, the actual robot code will be more complicated, but that is why there is a "Complex" section in this tutorial! To make the subsystem, right click on the subsystems package on the projects pane on the left and create a new subsystem.

By convention, names of classes are capitalized with every word in them capitalized (there can be no spaces in class names). For this class, we will call it "Chassis". Also, we might abbreviate certain names to make the code easier to read. If the manager tells you to abbreviate "Rollers" to "R", you would make a subsystem "RMotor" and the automatic roller command as "RAuto", for example.
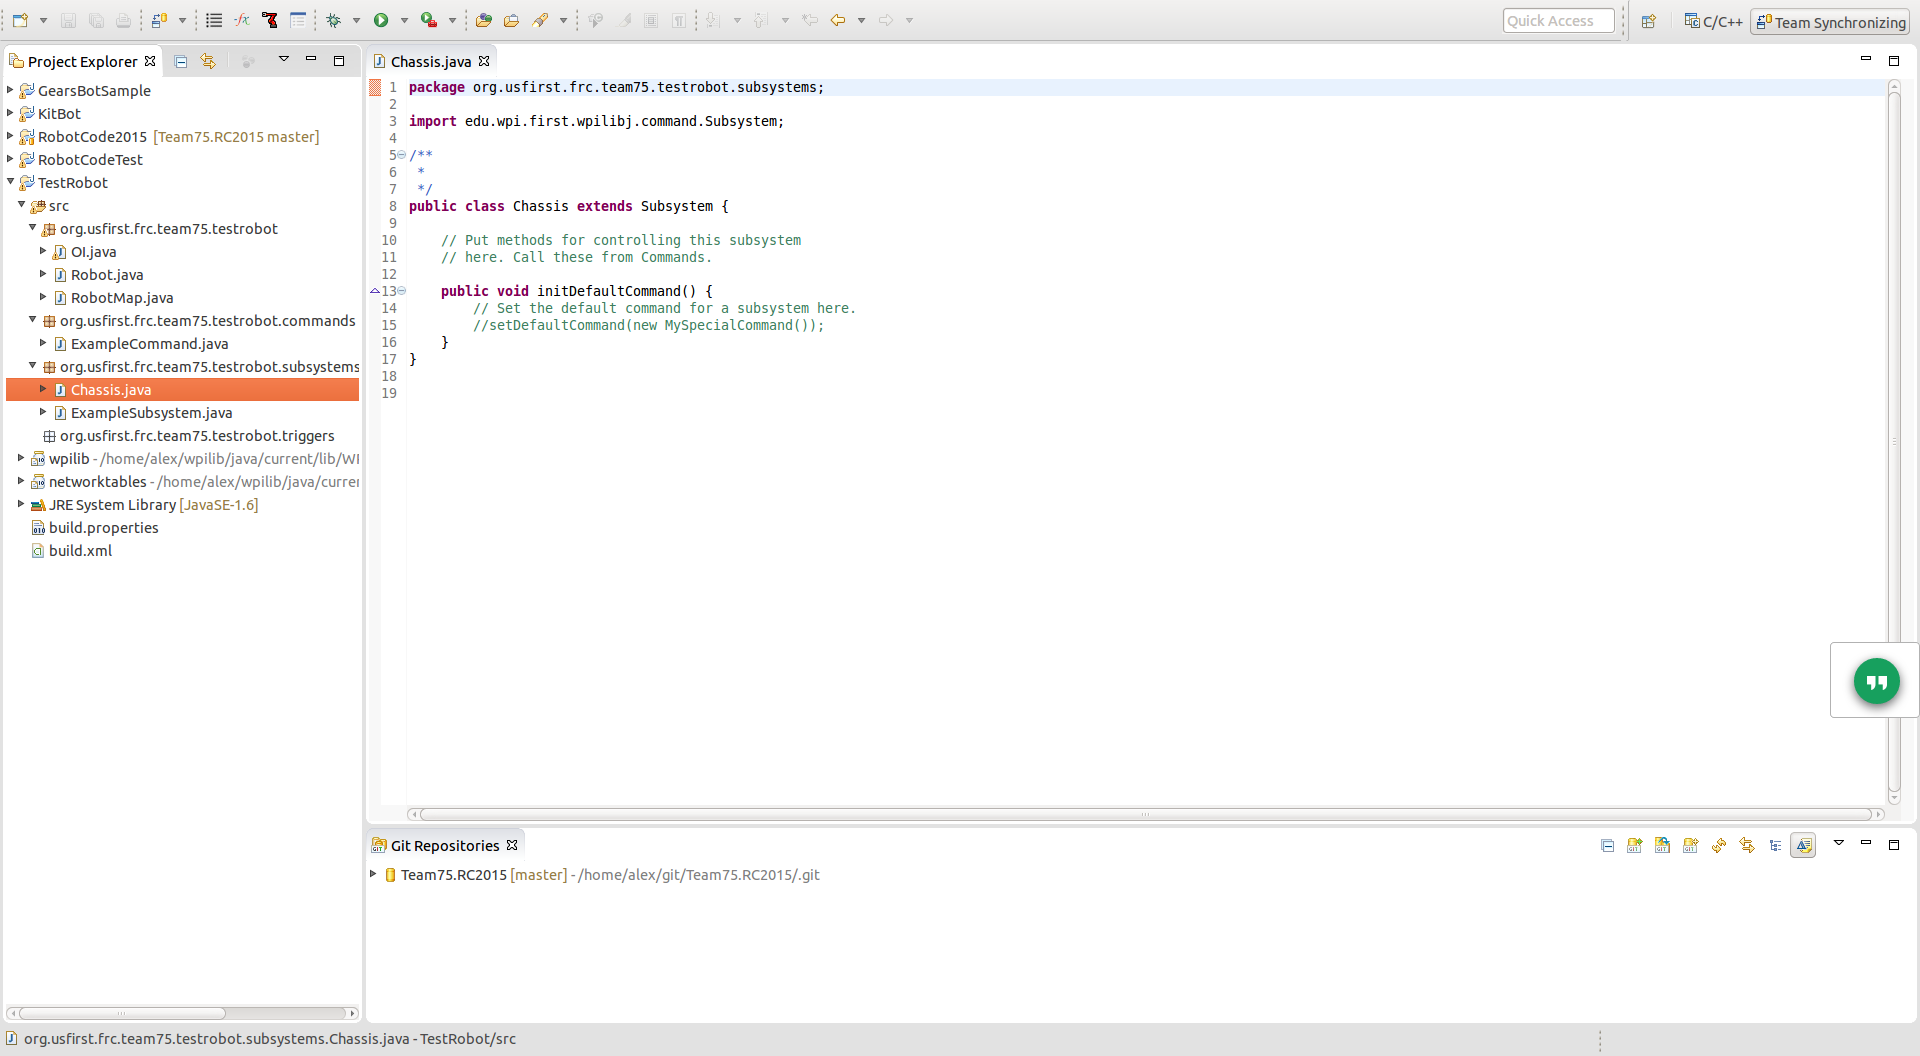
Once we have our subsystem created, you will be at this screen:
Now, you need to instantiate the hardware being used and create the methods of the subsystem to manage it. Here, you will need to use the FRC API to find out how to control the hardware. You can find one on this site here: FRC API Javadoc.
So, for the Chassis, we actually need to use 2 classes from the FRC API as the robot is driven by multiple motors (4 in our case). If you search "RobotDrive" in the FRC API, you will find all the methods the class for RobotDrive has along with the possible ways to instantiate it (different constructors). In addition to this, we need to declare Talons (the speed controllers) so RobotDrive knows what signals to give to the speed controllers. Let declare the variables in the class and instantiate them in a constructor like this:
RobotDrive chassis;
If you are wondering where that came from, look at the API. It shows the constructors for the Talon and RobotDrive classes right there. Also, make sure that whenever you create a motor, you set the safety to enabled. This makes sure that if the robot loses connection to the driver station, the motors stop. One special thing about the RobotDrive motors is that some of them run in reverse of each other because of the way they are set up mechanically. Make sure to set the inverted motors as well, or else the gearboxes may explode (assuming we try to go full speed forward as our first test). Don't worry about breaking the robot on accident though. The programming manager will check the code and notify you if something needs to be fixed. Also, we are very careful when first trying out the robot. To set the inverted motors, the code is as such:
Talon fLeft;
Talon fRight;
Talon rLeft;
Talon rRight;
public Chassis() {
fLeft = new Talon(0);
fRight = new Talon(1);
rLeft = new Talon(2);
rRight = new Talon(3);
chassis = new RobotDrive(fLeft, rLeft, fRight, rRight);
chassis.setSafetyEnabled(true);
}
chassis.setInvertedMotor(RobotDrive.MotorType.kRearLeft, true);
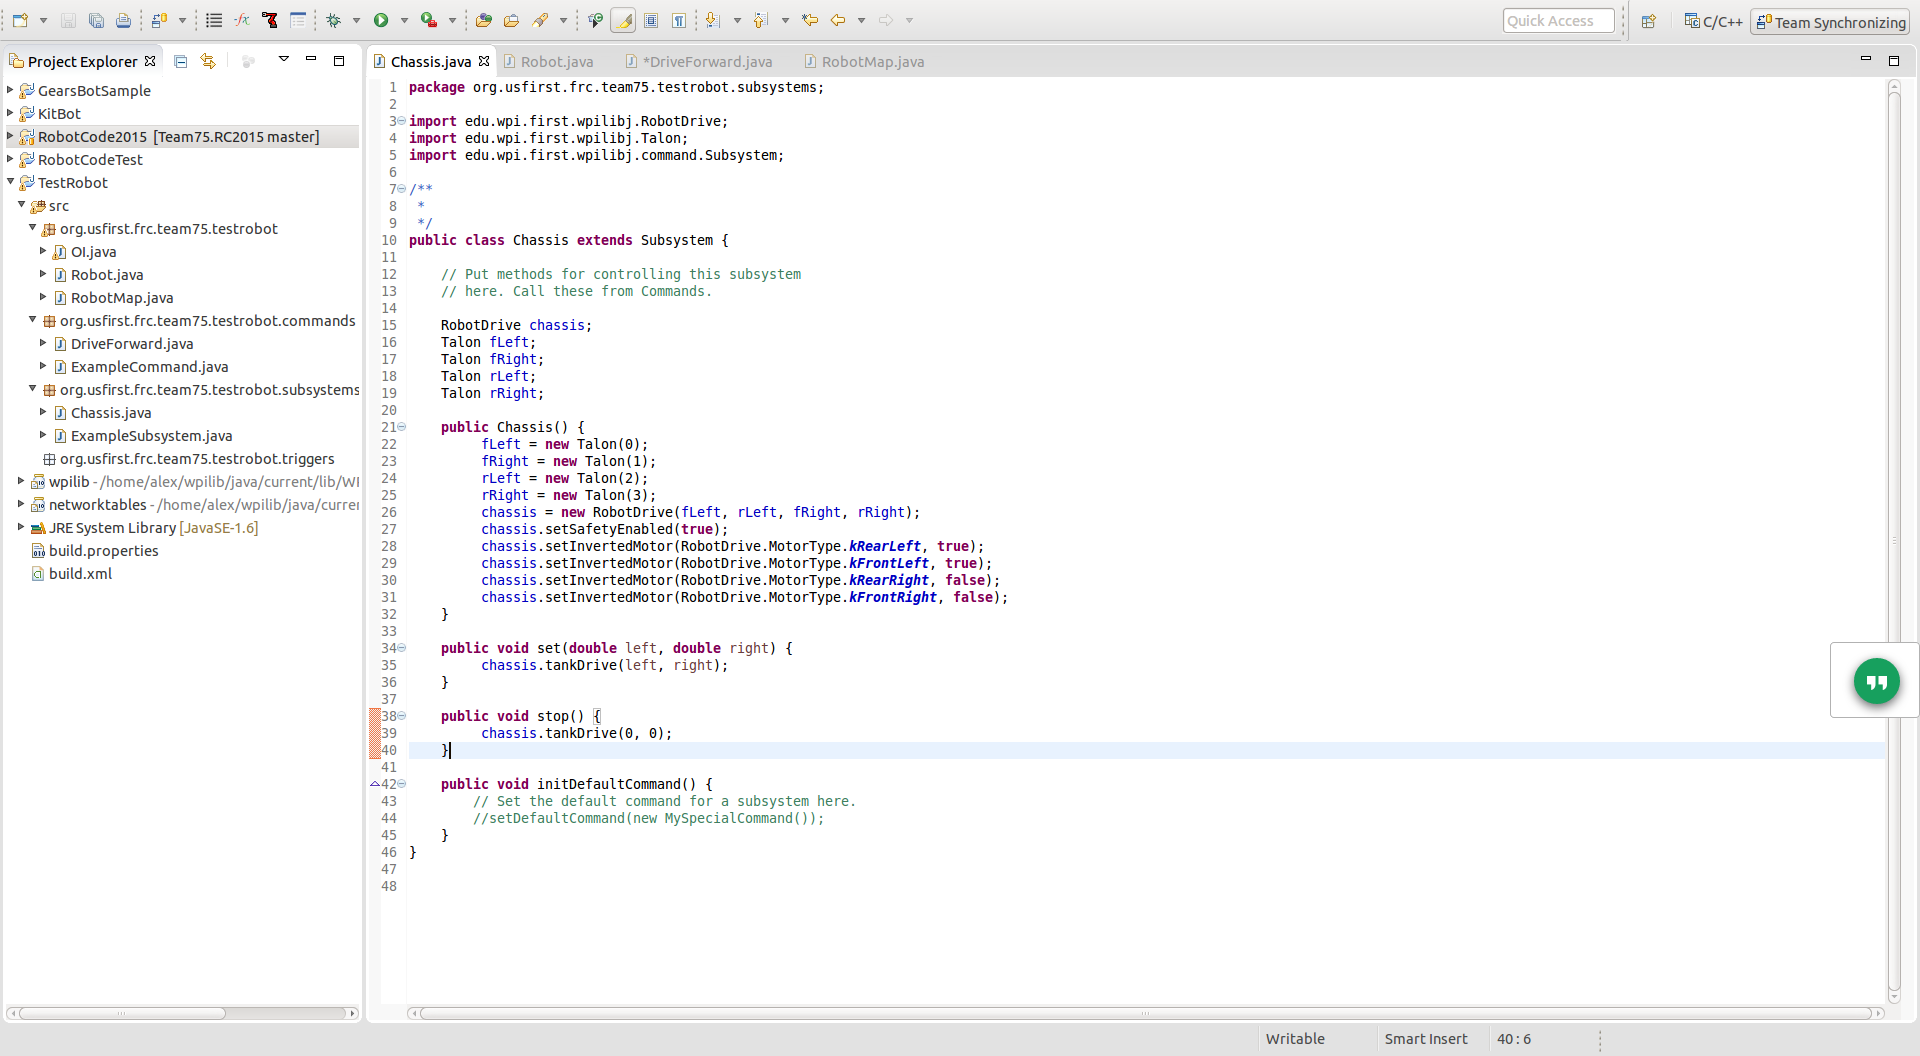
You will be given these values when the drive on the actual robot is set up. Now, your screen should look like this:
chassis.setInvertedMotor(RobotDrive.MotorType.kFrontLeft, true);
chassis.setInvertedMotor(RobotDrive.MotorType.kRearRight, false);
chassis.setInvertedMotor(RobotDrive.MotorType.kFrontRight, false);

You will notice that we have many errors. These are related to imports. Since the classes we are trying to access are not in the same package as the subsystem, the computer doesn't know where the class you are referring to is. To fix this, right click on a red underlined portion (or hit F2-Enter while the cursor is over it) and select "Add import ... " to add the import. This will fix the problem.


Now that everything in this subsystem is instantiated, what's the next step? Make the methods for the commands to use. For motors, we want to have a set and stop method. Our robot uses tank drive as its control method, and you can see how it is used in the API javadoc I mentioned earlier. One of the ways to use a tank drive is just to give double values to control the drives and we will always do this as we use our own scaling mechanims before giving values to the drive. The set method would look like this:
public void set(double left, double right) {

     chassis.tankDrive(left, right);

}
Your stop method would look like this:
public void stop() {

     chassis.tankDrive(0, 0);

}
The code now looks like this:
Now the only thing we haven't finished is the initDefaultCommand, but we haven't named our command yet. So, we move onto the next step, which is instantiating the subsystem in the Robot class. Remember, this is to be done on the programming manager's computer to prevent conflicts with other people's commits.
When instantiating your subsystem in the Robot Class, just use the ExampleSubsystem there as a template and modify it for your subsystem. Also, you will need to import the subsystem as it is in a different package. The code for this subsystem would look like:
public static Chassis chassis = new Chassis();
This is what your Robot class should now look like:

Now you can make your command. It is made the same as you made the subsystem, but you do it in the commands package instead and choose Command. We will call our command DriveForward. You will get a screen like this:
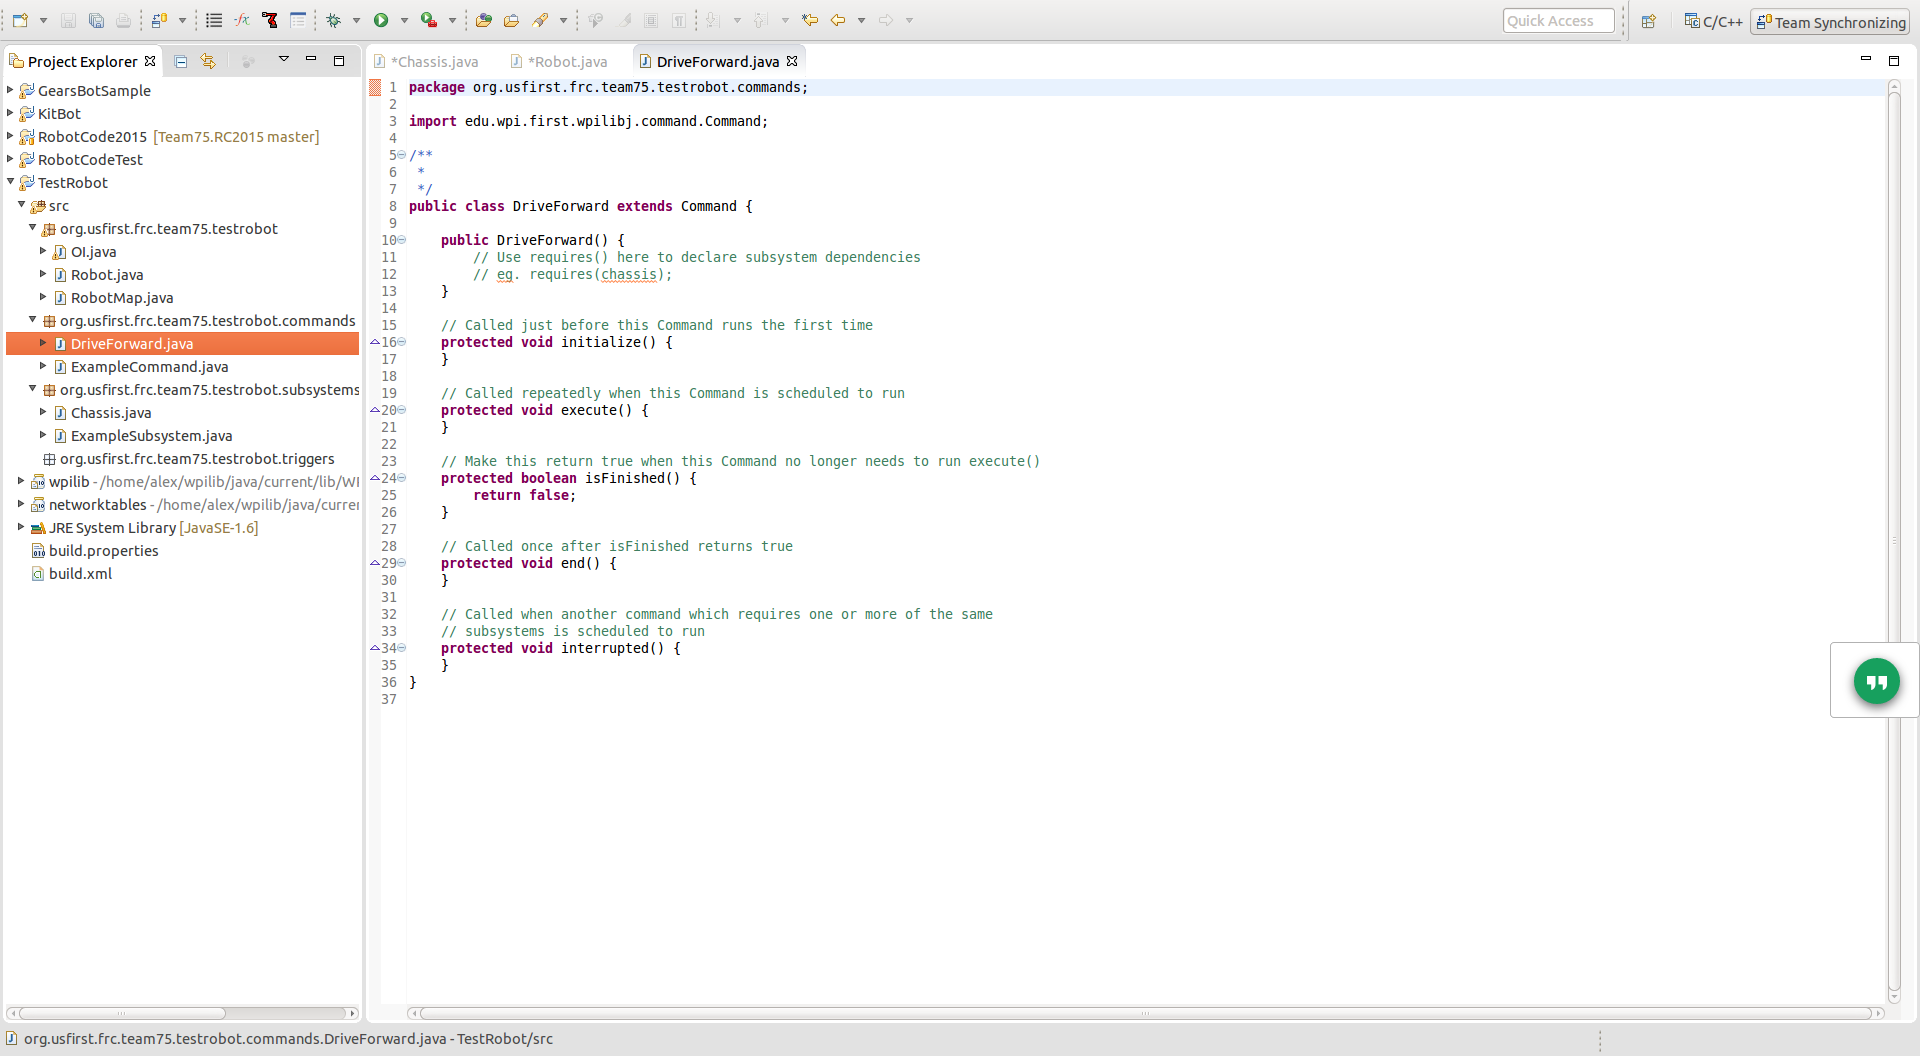
Now, let's code these methods in order. In the constructor, all we put are "requires". For this method, we require the chassis subsystem. Remember, we use the name we put in the Robot class. So, our code would be:
requires(Robot.chassis);
Now, let's do the initialize. In this case, there isn't really anything that needs to be done only when we start the command, so we'll leave it alone. Now, we're on execute. We want this command to make the robot simply drive forward at full speed. So, we will tell the subsystem that we want to go full speed, like this:
Robot.chassis.set(1, 1);
Remember that motor values range from -1 to 1. Now, we move on to isFinished. We haven't said when this command should stop automatically, so we will not bother with that at the moment. This leaves us with end and interrupted. The only code in both of these is just to stop the motors completely. The code would be:
Robot.chassis.stop();
The finished command should look like this:

Now you have a basic robot code that drives forward. Now we will go on to the complex section, where we will talk about more advanced code and structure it more the way that we would for our final robot code.
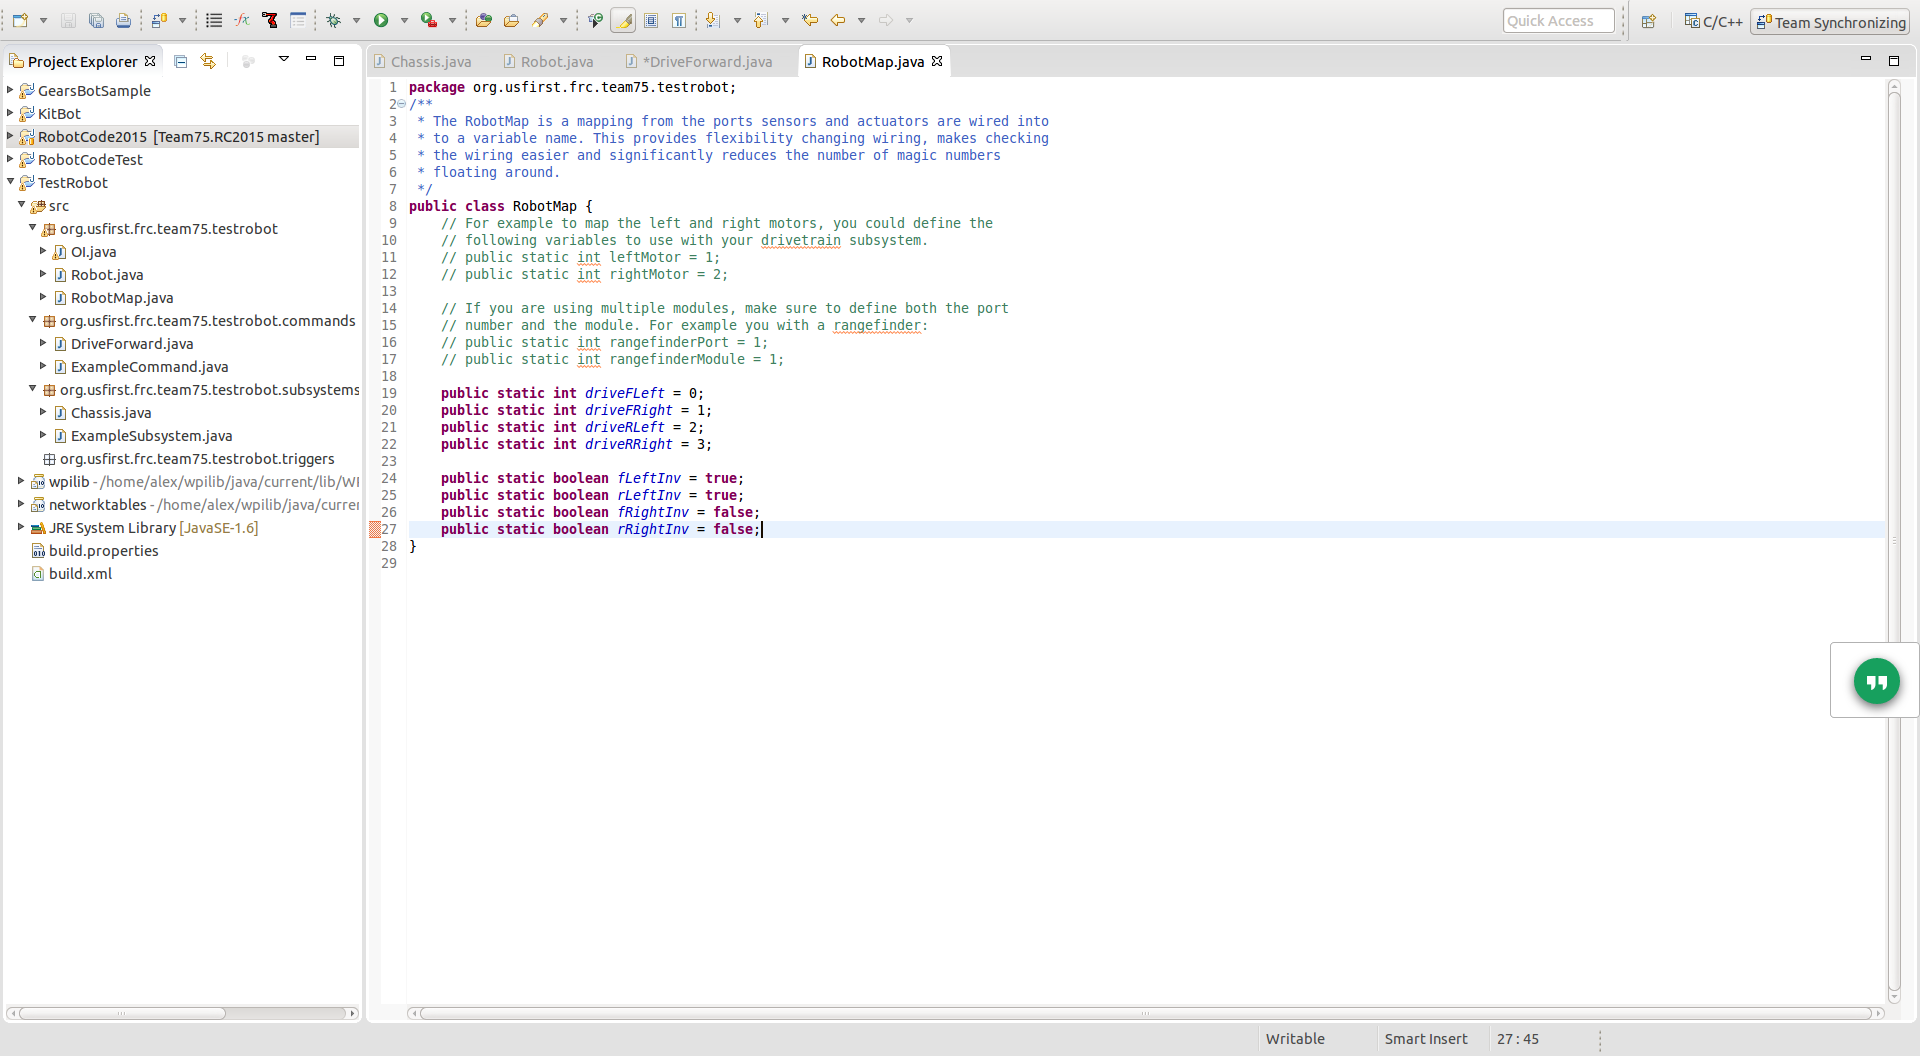
One of the more complex things in the code is the RobotMap. As I explained in the FRC API Basics section, the RobotMap is used for wiring that is unknown to us until eletrical gets it sorted out. To use the RobotMap, look at the commented code in that class and modify that so it stores the data you want. For instance, we will want to do this for the motor ports of the drive motors and also for which motors are inverted. This is what a motor port defined in the RobotMap class should look like:
public static int driveFLeft = 1;
For which drive motors are inverted, we use a boolean:
public static boolean fLeftInv = true;
Using some arbitrary values for the total of eight values we would have, the RobotMap would look like this:
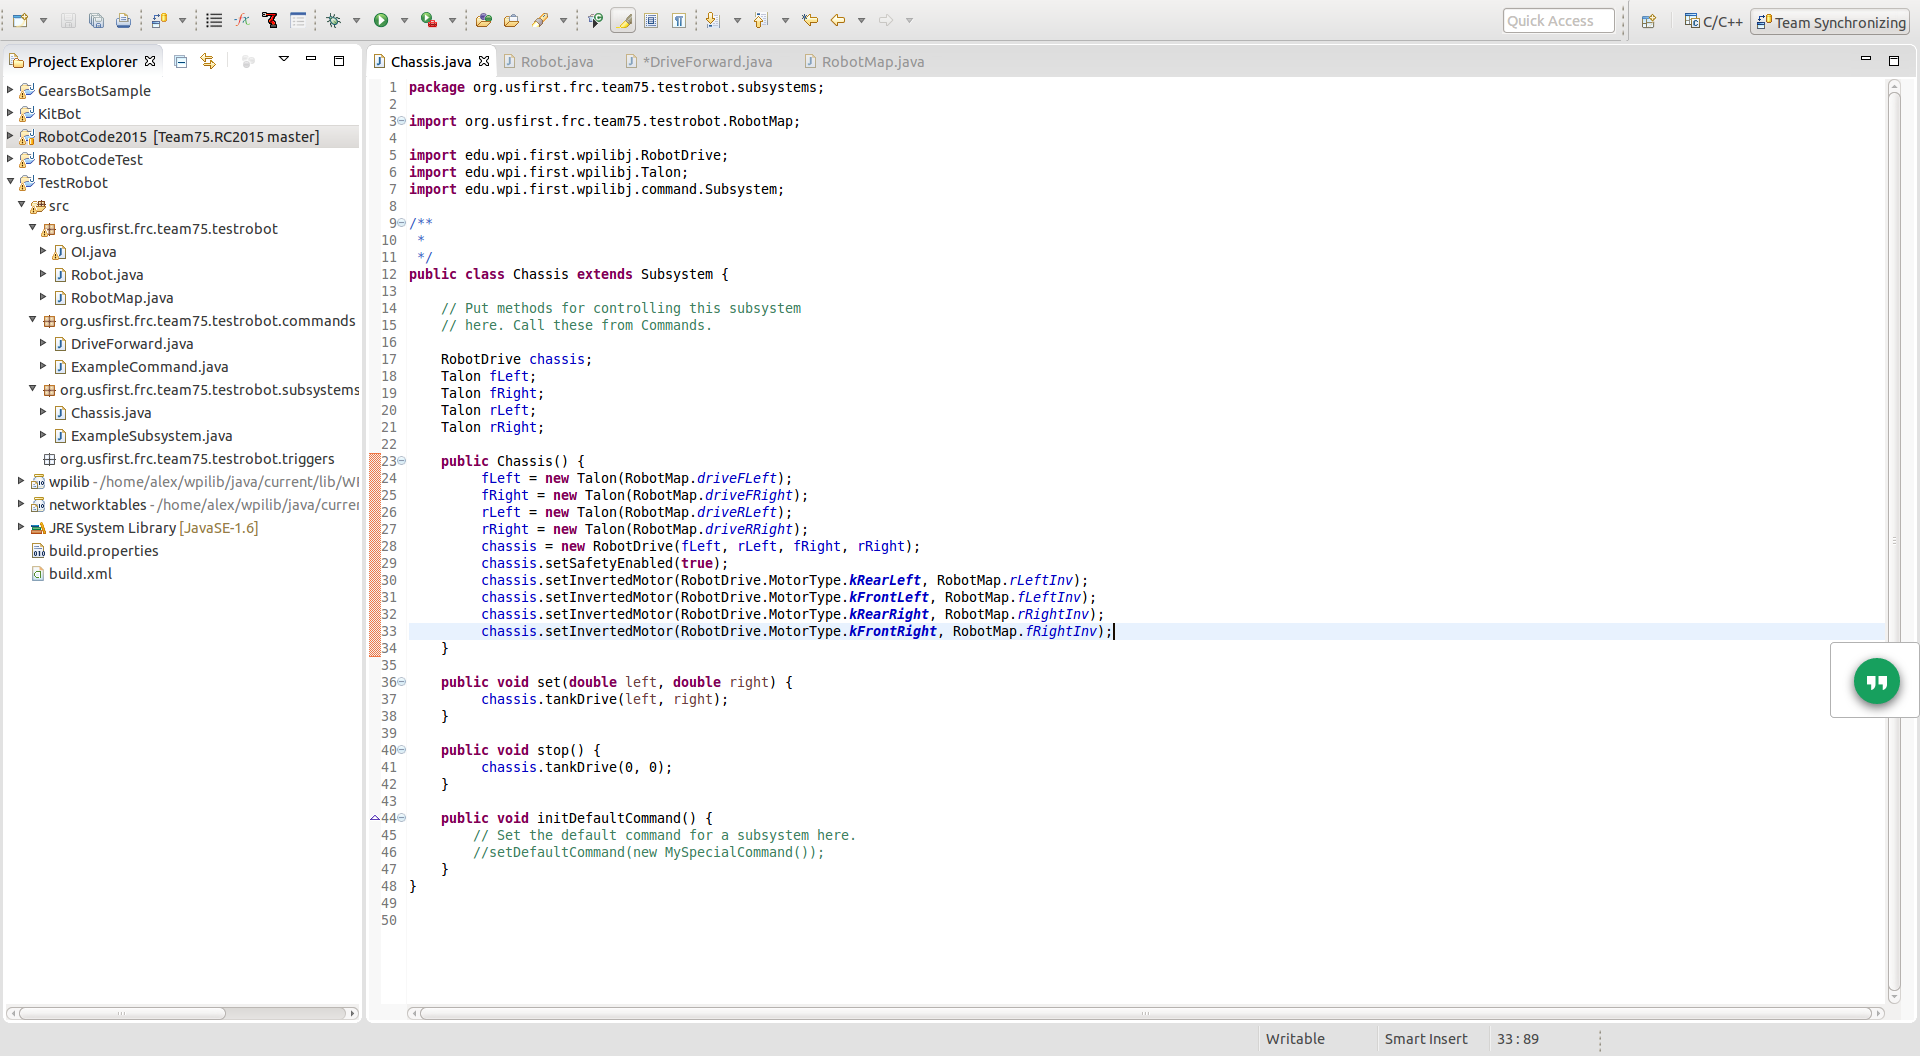
Now, to use these in our chassis subsystem, we replace the values from the subsystem with the values from RobotMap. For instance, we would replace "1" from the front left Talon to:
RobotMap.driveFLeft
In Eclipse, you will get suggestions once you hit the period after RobotMap. Then you can select what you want using your arrow keys and enter. If it is the first time you're using the RobotMap in this subsystem, it will import RobotMap as well. This is what the chassis subsystem would look like using the RobotMap values:
Now, let's talk about the Operator Interface. It acts as a data store, similar to the RobotMap, and also tells the robot what commands to execute when the drivers press a certain button on their controllers. First, let's declare 3 joysticks first (the 2 driving joysticks and the PS/XBox controller). We would first declare our port and then our actual joystick. The Joystick and JoystickButton classes need to be imported, so watch out for that. Here's what the code would look like:
public static final int JOYSTICK0_PORT = 0;

public static final int JOYSTICK1_PORT = 1;

public static final int JOYSTICK2_PORT = 2;

public static Joystick stick0;

public static Joystick stick1;

public static Joystick stick2;

public final JoystickButton driveFwd;

public final JoystickButton driveJoy;
Now, to instantiate these devices, we create a constructor and put our instantiation lines there. This is what that would look like:
stick0 = new Joystick(JOYSTICK0_PORT);

stick1 = new Joystick(JOYSTICK1_PORT);

stick2 = new Joystick(JOYSTICK2_PORT);

driveFwd = new JoystickButton(stick0, 1);

driveJoy = new JoystickButton(stick1, 1);
Now that we have everything instantiated, let's tell the robot what to do when the 2 buttons we've declared are pressed. The JoystickButton class has 3 methods that tell the robot what to do when they are pressed. These three are: whenPressed, whileHeld, and whenReleased. The whenPressed and whenReleased start a command when pressed and released respectively. The whileHeld runs the initialize method of a command continuously until the button is released. For the 2 buttons we have in our test project, we will use whenPressed. Note that whenever you set a command in OI, you must import it. This is what our code would look like:
driveFwd.whenPressed(new DriveForward());

driveJoy.whenPressed(new DriveWithJoystick());
Note that we will be creating the DriveWithJoystick command soon, so don't worry if you're getting an error there. This is what the finished OI looks like:

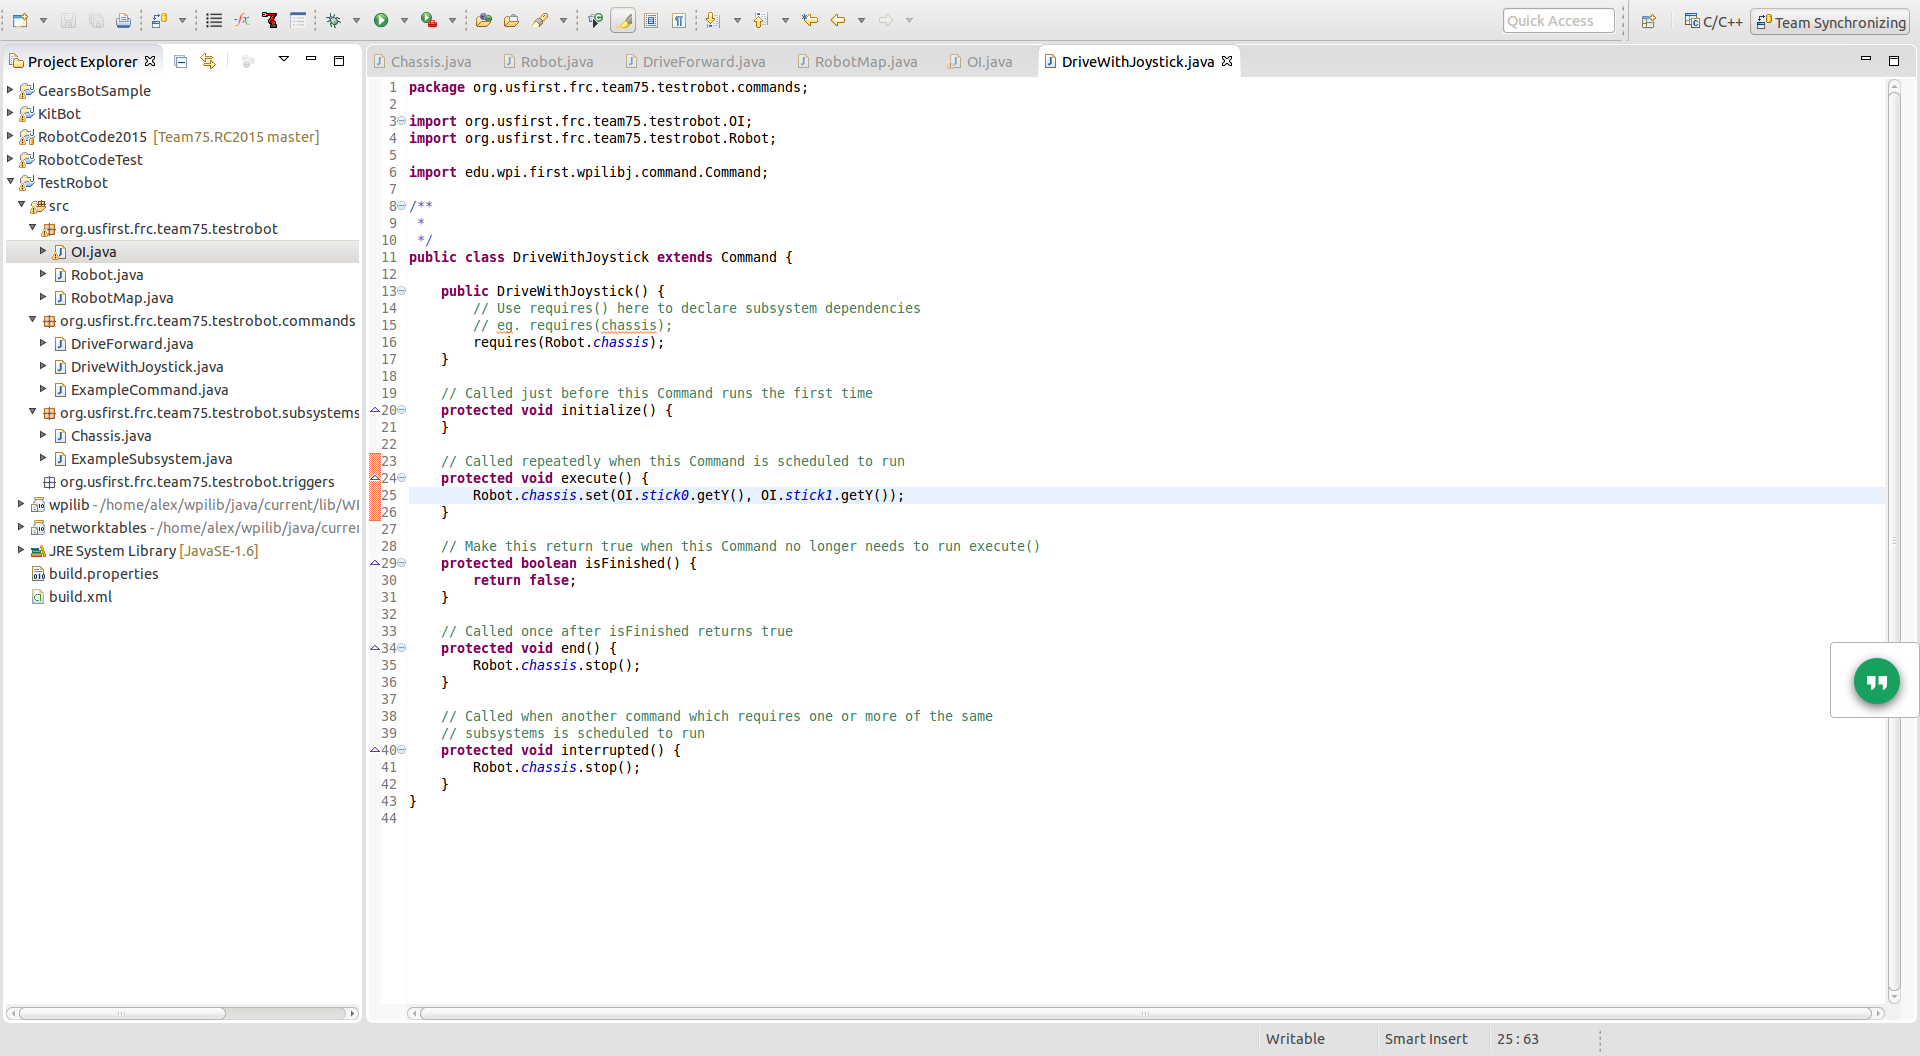
Now, let's make a new command called DriveWithJoystick and use the joystick values to drive the robot. The code will be the same as the DriveForward class, except it will have a different execute method. Instead of simply giving values of 1 to the motors, we will give it the joystick values (which range from -1 to 1 as well). We use the Y-axis of the joysticks when driving. Here's what this code would look like:
Robot.chassis.set(OI.stick0.getY(), OI.stick1.getY());
OI will have to be imported, but if you just use the drop-down menu that appears after you type the period, it will automatically import that. This is what the command should look like:
Don't forget to add the import now in OI for this command, as it is used by the driveJoy button. Also, you should add this command as a default for the chassis subsystem as this is a command you will want to be run automatically when the robot is running. The code for that would look like this and be put in the initDefaultCommand method of the subsystem:
setDefaultCommand(new DriveWithJoystick());
You will have to import that command (as you can tell, that is a common theme throughout the project, lots of imports). Here's an image of that:

The 2 things we have not talked about that we will need in the final robot are autonomous and command groups. Command groups are basically a type of command that simply executes other commands in order or asynchronously (at the same time/parallel). To add a command to a command group, you would put:
addSequential(command);
This will start a command and wait until that command finishes to start the next. To have a command run separate from the rest of the commands at a certain point in the group's order, you would use "addParallel" instead. So, if you want command1 and command2 to run at the same time, you would type:
addParallel(command1);

addSequential(command2);
The command group will continue once the sequential command finishes without regard to when the parallel command finishes. The most common use for command groups for us is in autonomous. As our example project was extremely basic, I will not show you how to do this in the example project. For reference, look in the code used on our actual robots (links in the Example Project section below). You will see the autonomous chooser that allows our drivers to choose which autonomous mode to use (as we have multiple) and how that is used in the RobotMain (specifically the robotInit and autonomousInit methods). The Autonomous Chooser is also explained in the "Super Complex" section of this tutorial.
These are links to the turorial and 2014 robot codes:
To add a zipped project to your Eclipse, use File → Import ... . Whe you get to the window, select "General" and then "Existing Projects into Workspace". When you hit next, you will be able to choose a folder or an archive file to import.
If you want another tutorial, you can look at this tutorial, made by WPI, the university that helped create and maintains the FRC Java API: WPILib Robot Programming Cookbook. Do note that it is from 2012 so it has some outdated information and it is quite complicated.
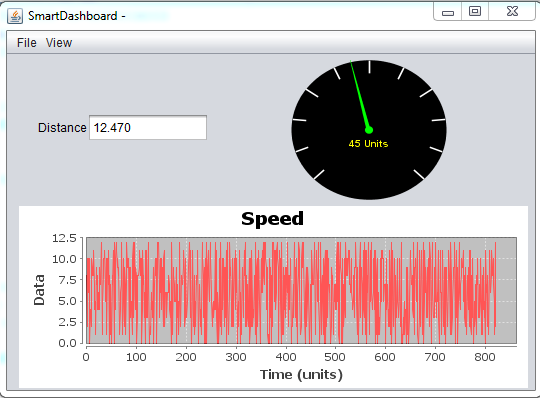
For receiving values from the robot and sending "Preferences" (explained lower) to the robot, we use what is called the SmartDashboard. In the robot code, we specify what data are read and sent to the SmartDashboard. The information is automatically read by the SmartDashboard so the drivers can see it. When the driver sends "Preferences", these are read and saved onto the internal memory of the robot. In this section, we will only talk about sending values to the dashboard. Preferences are described in detail in a lower section.
There are many reasons why one may want to send values to the dashboard for the drivers. While it is mainly used by the programmers trying to debug code, it may be useful for the drivers to see various information such as alignment info from a camera, height or angle info for an arm, or distance/speed information.
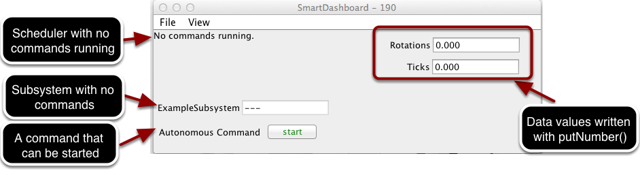
Here are some screenshots from the WPILib website:
For basic installation and setup, refer to this website: Getting Started with the SmartDashboard.
Sending information to the SmartDashboard is easy. You simply have to add one line like this to your code:
SmartDashboard.putX("Name of info to be displayed on Dashboard", varToSend);
In the above code, X can be: Number, Boolean, String, or Data. An actual example from the 2015 robot is:
SmartDashboard.putNumber("Elevator Height", Robot.eEnc.getDistance());
This code sends a the calculated distance of the elevator of the robot and sends it to the SmartDashboard with the label "Elevator Height". The SmartDashboard takes that information and automatically places that number in an empty space on the dashboard. The drivers can then move that info box anywhere they want on the dashboard and also change it from a displayed number to a Compass, LinePlot, ProgressBar, SimpleDial, or FormattedField. These settings are stored in an xml file so they can be transferred between computers easily.
The putData method may be a bit confusing as it isn't as specific as putNumber, putBoolean, and putString. The putData method can send any object that implements the Sendable class. You can see what is able to be used in the "All Known Implementing Classes" section in the specification for the Sendable class in the javadoc. The one's explained on WPILib's site are: Command, Subsystem, Scheduler, and the Sendable Chooser (explained lower in the Auto Chooser section below). If you send a command, you will be able to start the command directly from the Dashboard. This can be useful when testing various commands to be used in Autonomous, Command Groups, and various commands that need to be tested. Sending a scheduler will show you every command running and will also allow you to cancel a command. If you send a subsystem, it will tell you what command is currently using that subsystem. The SendableChooser will send a list of options of anything to be chosen from by the drivers, such as autonomous options. This can allow very quick testing between multiple version of different commands that do similar things, different versions of a subsystem, and many more things. The most used and probably most useful option is sending commands or command groups to be used for autonomous. To learn about that, move to the the next section. If you want more in depth information about the SmartDashboard, use the Getting Started link: Getting Started with the SmartDashboard.
In this section, we will talk about how to use the SendableChooser to allow the drivers to choose from multiple autonomous Commands or CommandGroups. The first thing is to declare a global variable in the main Robot class. This needs to be done because we will be accessing this variable from both robotInit() and autonomousInit(). To do this, simply add this line after the subsystem declarations:
public static SendableChooser autoChooser;
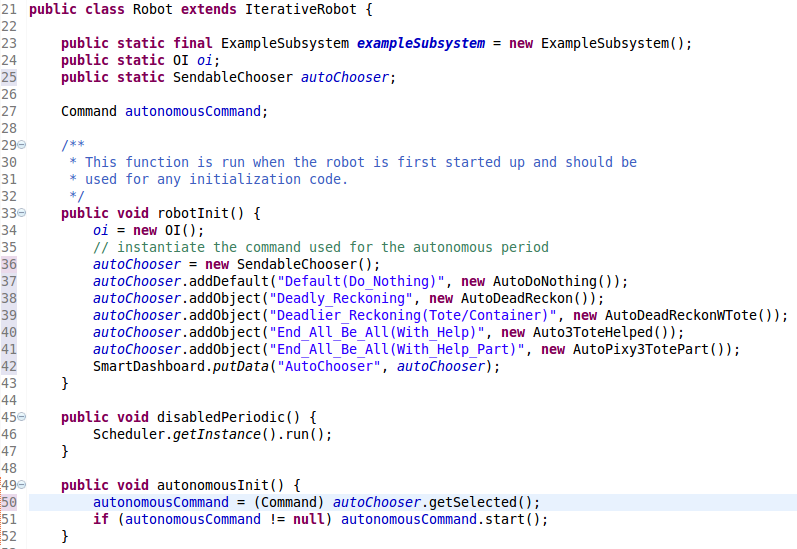
Now we can edit the same SendableChooser object in both robotInit() and autonomousInit(). First, we will do the robotInit() method. This is where we set up the Chooser with everything we need. The first, as with any object, is the instantiation. After it is instantiated, there are two methods we can use on the object: addDefault() and addObject(). Only one command or CommandGroup can be added as the default. For safety reasons, the default should always be a command that does nothing, so that the robot doesn't do anything that may be dangerous and the drivers cannot connect to the robot to tell it otherwise. Finally, once all the options are added, you need to use the SmartDashboard.putData() method to send the chooser to the Dashboard. Here is a snippet of the robotInit() code used in the 2015 robot (the full code contains 14 options, so I have removed some to shorten the example):
autoChooser = new SendableChooser();

autoChooser.addDefault("Default(Do_Nothing)", new AutoDoNothing());

autoChooser.addObject("Deadly_Reckoning", new AutoDeadReckon());

autoChooser.addObject("Deadlier_Reckoning(Tote/Container)", new AutoDeadReckonWTote());

autoChooser.addObject("End_All_Be_All(With_Help)", new Auto3ToteHelped());

autoChooser.addObject("End_All_Be_All(With_Help_Part)", new AutoPixy3TotePart());

SmartDashboard.putData("AutoChooser", autoChooser);
Now the drivers will be able to choose which autonomous mode they want to run right before a match starts! However, there is still one thing missing. We have not set the driver's choice of autonomous to actually run. This can be done in autonomousInit(). All we need is one line, setting autonomousCommand equal to the choice of the driver. Add this line to the start of autonomousInit() to do so:
autonomousCommand = (Command) autoChooser.getSelected();
Now, immediately before autonomous is started, the robot will ask the SmartDashboard what option was selected in the SendableChooser and set that option as the autonomousCommand. If the robot cannot connect to the SmartDashboard, the default (which should be DoNothing) will run. Here's a screenshot of the above code correctly set up in eclipse:
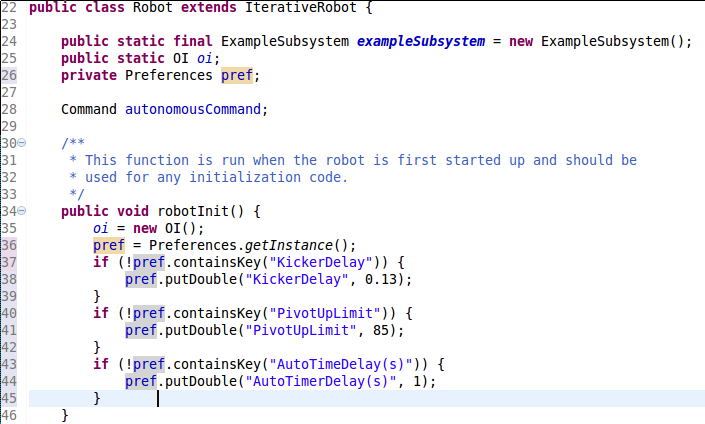
Sometimes, you need to send values to the Robot other than a choice from a SendableChooser. For instance, the 2014 robot needed a delay between the spring-loaded kicker being released to the rollers activating for maximum ball launching distance. It would be impractical to have to reload the robot code and restart the robot multiple times just to test a few different values, so this is something we would need Preferences for. Preferences and certain values on the robot that have a default value and can be modified by the drivers through the Dashboard. These values are stored locally on the robot, so even when you restart the robot, the values set previously by the drivers remains the same. The declaration is done the same way, but the instantiation is done a bit differently. To instantiate, you do prefs = Preferences.getInstance(); . After it had been instantiated, you have to check to see if the values you need exist on the robot's internal storage. If they don't, you create it. The methods to put the values into the preferences are: putInt, putFloat, putLong, putDouble, putBoolean, and putString. Each of these takes a key name and an initial value. Here is an example with the kicker delay described above along with an upper limit for an arm and drive delay for autonomous:
pref = Preferences.getInstance();

if (!pref.containsKey("KickerDelay")) {

   pref.putDouble("KickerDelay", 0.13);

}

if (!pref.containsKey("PivotUpLimit")) {

   pref.putDouble("PivotUpLimit", 85);

}

if (!pref.containsKey("AutoTimeDelay(s)")) {

   pref.putDouble("AutoTimerDelay(s)", 1);

}
Here is a screenshot of that above code in Eclipse:
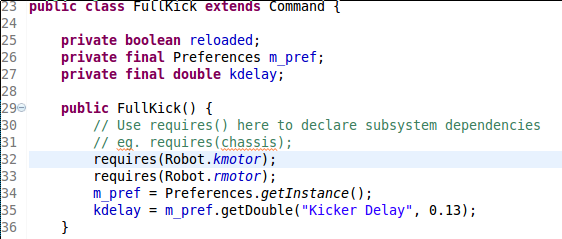
Now the values are set up and ready to be used. To actually save the keys, you have to use pref.save() . Calling save() too often can damage the flash memory, so it should be set to save only about once a minute during teleop. You can also create a command that simply saves the preferences once teleop ends. To use these values in a Command, you need to declare it and instantiate it within that command. Then, you can use the get command that corresponds to the put command used in the main (just replace put with get). The get commands need the key declared in main and a fallback value in case it can't find that key in the preferences. Here is an example getting the Kicker Delay created in the earlier example.
kdelay = m_pref.getDouble("Kicker Delay", 0.13);
Here is a larger chunk of that code in Eclipse:
Now you know how to set persistent values on the robot from the Dashboard.
NOTE: The Preferences will not automatically be opened on the Dashboard. They can be added by going to View → Add → Robot Preferences.
PID is used to allow a robot to reach a setpoint for something, whether it is the angle or height of the arm or a distance driven. PID is a complicated topic and knowledge of calculus is useful to understand it. However, the I and D values which use calculus aren't commonly used on our robots. Now, let's explain what PID stands for.
P stands for proportional. It is the most simple part of PID and the most important. It simply tries to reach a setpoint. P is calculated by multiplying the a given "error" by the value of P. For instance, if you want your robot to drive 80 inches and start slowing down at 20 inches, you would give the error as (80 - inches driven) and you would use a P of 0.05 (anything higher than 20 multiplied by 0.05 would be greater than 1, so the robot would drive full speed. Anything under 20 would be below 1). You also need a tolerance, either absolute (such as inches) or percentage. This needs to be set to a value that makes sense in regards to motor response. Most motor controllers only respond to a signal with an absolute value grater than 0.04. If you try to give a value between -0.04 and 0.04, the motor will not do anything as that is likely in its "deadband". Also, the motor may simply not be powerful enough to move the robot, arm, or whatever the motor is controlling at low speed. This is part of the reason we have a tolerance (in our 2015 robot, the encoder reads to the 1/64th of an inch. The motor would not respond at lower speeds and thus the preset motor positions would not end their commands without some tolerance). The way to figure out the best values is just experimentation. The basic explanation above, however, is a good starting point.
I stands for integral. The integral attempts to correct the output based on past error. An integral is the area under a curve, and if you place your goal and current state on a graph and find the area between these lines (under the goal is negative area), you have the integral. If done for an example like above where we're driving to a setpoint, you will overshoot the goal, then drive backwards, and forward agains, etc. What is a good use for it? A common example is the thermostat of a house. It will help adjust the temperature and keep it steady. For a robotics team, we could use it to keep an arm steady if that arm doesn't hold its position well (such as the 2011 robot Ellen, whose design could cause the arm to go up if no current was being applied to the motor). We haven't used it too much in past years.
D is the final letter and stands for derivative. The derivative attempts to predict the future to further optimize performance. This is done by further smoothing out the line, allowing for higher P and I values while maintaining stability. There tends to be a lot of noise in the input and the derivative value can mess up a system quite badly if it isn't smoothened. We have used the derivative values in the past, but only with very, very low values that had minimal effect on the system.
To go more in depth, go to this site, which was used to help make the quick guide above: PID for Dummies.
Now, let's get into the programming side of this. There are two ways to implement a PID loop with the FRC Java API: PIDCommand and PIDSubsystem. I recommend using PIDCommand, because PIDSubsystem means that you will always need to set a setpoint and let the robot go to that position. With PIDCommand, you can switch to manual control when you need it, and setpoint control when you need that. So, let's create a PIDCommand!
First make a normal command and then change extends Command to extends PIDCommand. This will result in three errors. First, PIDCommand must be imported. Second, two methods need to be implemented in your command, the two being: returnPIDInput() and usePIDOutput(). The first two are easy to fix, as Eclipse will notify you about them and give you the option to autofix them. The final error will be that the superclass's constructor must be called. Basically, whenever you see the extends statement, that class is based off of the extended class, which is called the superclass. The class you are editing is called a subclass. This is why all Commands and Subsystems have the same default structure: they are based off of the same classes. When you extend PIDCommand, you have to contain the methods of the superclass (PIDCommand). Superclasses also have their own methods that can be called through the subclass. This is why Command.cancel() cancels a command and why you can use the requires method, even though you don't code a cancel() or requires() method.
The superclass has to be instantiated along with the subclass for the subclass to work, but usually the superclass has an empty contructor so the programmer does not have to explicitely call the contructor; the compiler adds it in when it creates the runnable code to be sent to the robot. However, PIDCommand's constructor requires 3 arguments: P, I, and D. Thus, the first line in the constructor of the PIDCommand subclass you are making should be:
super(P, I, D);
With that line in, your code is now without errors. Now, let's get to how to code the rest of this. We still have the same methods as before, so just as before, you will use end and interrupted to stop all subsystems, put the requires in the constructor, and so on. There are a few changes in the initialize and execute methods however. In initialize, we need to set all the values required for the PID controller. Methods that can be used directly in PIDCommand are listed in the API. You can also use methods from PIDController, also listed in the API, by using getPIDController(). Here is an example from the 2015 season that sets the setpoint, input range, output range, and an absolute tolerance (all the values were in RobotMap; for this example I have changed them all to their respective values to make it easier to read):
protected void initialize() {

   finished = false;

   setInputRange(0, 66);

   setSetpoint(15);

   getPIDController().setAbsoluteTolerance(0.25);

   getPIDController().setOutputRange(-0.5, 1);

}
Note: Distance units are inches and the output going down is only at half speed because the arm would go down too fast at -1 speed.
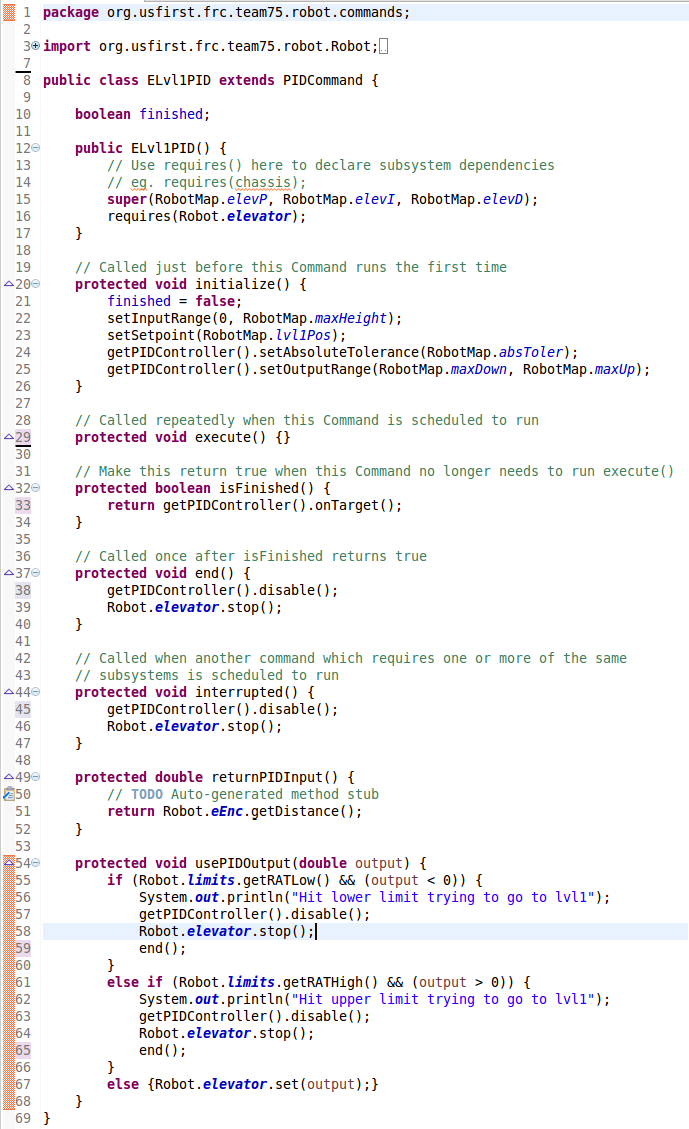
The difference with the execute method is that you will need to run only code that does not deal with PID. Usually, you don't really need any code. Any code that deals with PID will be in the usePIDOutput() method. The code for command from the 2015 season is a bit complex. It has 3 different if blocks. 2 of them disable the PIDController and motor if the arm is going up and hits the upper limit or if the arm is going down and hits the lower limit for safety purposes. If none of those conditions are met, it simply sets the the motor value to the output from the PIDController (passed to the method as a double called output). This is what the method looks like (the actual code from 2015 is slightly different; the original code was over complicated due to sloppy coding due to the need for fast coding):
if (Robot.limits.getRATLow() && (output < 0)) {

   System.out.println("Hit lower limit trying to go to lvl1");

   getPIDController().disable();

   Robot.elevator.stop();

   end();

}

else if (Robot.limits.getRATHigh() && (output > 0)) {

   System.out.println("Hit upper limit trying to go to lvl1");

   getPIDController().disable();

   Robot.elevator.stop();

   end();

}

else {Robot.elevator.set(output);}
As I mentioned, there are two methods added for PID control compared to a normal method. The other method returnPIDInput() is very simple. You simply give it the current value of whatever the setpoint is for. If you're trying to go a certain distance, you return the current distance in this method. Thus, the only line of code in this method for our example above is:
return Robot.eEnc.getDistance();
That's it for the PID methods. Now, what do we do when the setpoint is reached? If we need to maintain that setpoint, we just let the code the way it is. In many cases, however, you want the command to end. To do this, return getPIDController().onTarget() in the isFinished() method. This will tell the command to end once it reaches the setpoint within the set tolerance. Also, make sure you disable the PIDController in the end() and interrupted() methods, as seen in the example code above. This is what the final resulting code should look like:
That's it! Now you can go and make commands that use PID like a pro!